
tutorials
Launching an instance on Jetstream 2
Overview
This tutorial provides instructions for launching an instance (virtual server) on Jetstream 2 using the Exosphere user interface.
Outcomes
- Configure, launch, and manage an instance on Jetstream 2
Prerequisites
- An NSF ACCESS ID with your Current country of residence set.
Background
This section provides a bit of background on the key technologies involved in this tutorial.
What is Jetstream 2
Jetstream 2 is a large, feature-rich national computing resource hosted at Indiana University.
What's ACCESS?
ACCESS is a way for you to gain free access to national computing resources distributed across the US.
ACCESS is a program established and funded by the U.S. National Science Foundation to help researchers and educators, with or without supporting grants, to utilize the nation's advanced computing systems and services – at no cost to you.
Why use ACCESS?
Free: Unlike most commercial cloud providers, US students and researchers can usually gain access to national compute infrastructure at no cost.
Familiarize yourself with cloud computing practices: Many of the concepts you'll learn translate directly to commercial cloud provider like AWS.
Prerequisites
Before starting, ensure that …
- you have created an NSF ACCESS ID
- set your Current country of residence in your ACCESS profile
- shared your ACCESS ID with your instructor
Part 1: Your SSH key
In this tutorial, we'll be connecting to our instance over the Secure Shell (SSH) protocol. To do so, we'll need to create a cryptographic key with two parts: a public key and a private key.
You can think of the public key as a fancy lock and the private key as the key to that lock. You can put the lock on whatever door you want (…and as many doors as you want), but you want to keep your key somewhere safe.

1. Create an SSH key
In order to connect to the instance you'll be creating, you'll need to create an SSH key and copy the public portion:
ssh-keygen -t ed25519 -C "yournetid@arizona.edu"You'll be prompted to specify a location to save your file. Try /path/to/home/.ssh/jetstream2 replacing /path/to/home/ with the path (from the root) to your home directory.
Next, you'll be prompted to set a password. If you'd prefer to do so, you can leave this blank.
take note of the the public portion of the key .pub.
2. Register your SSH key
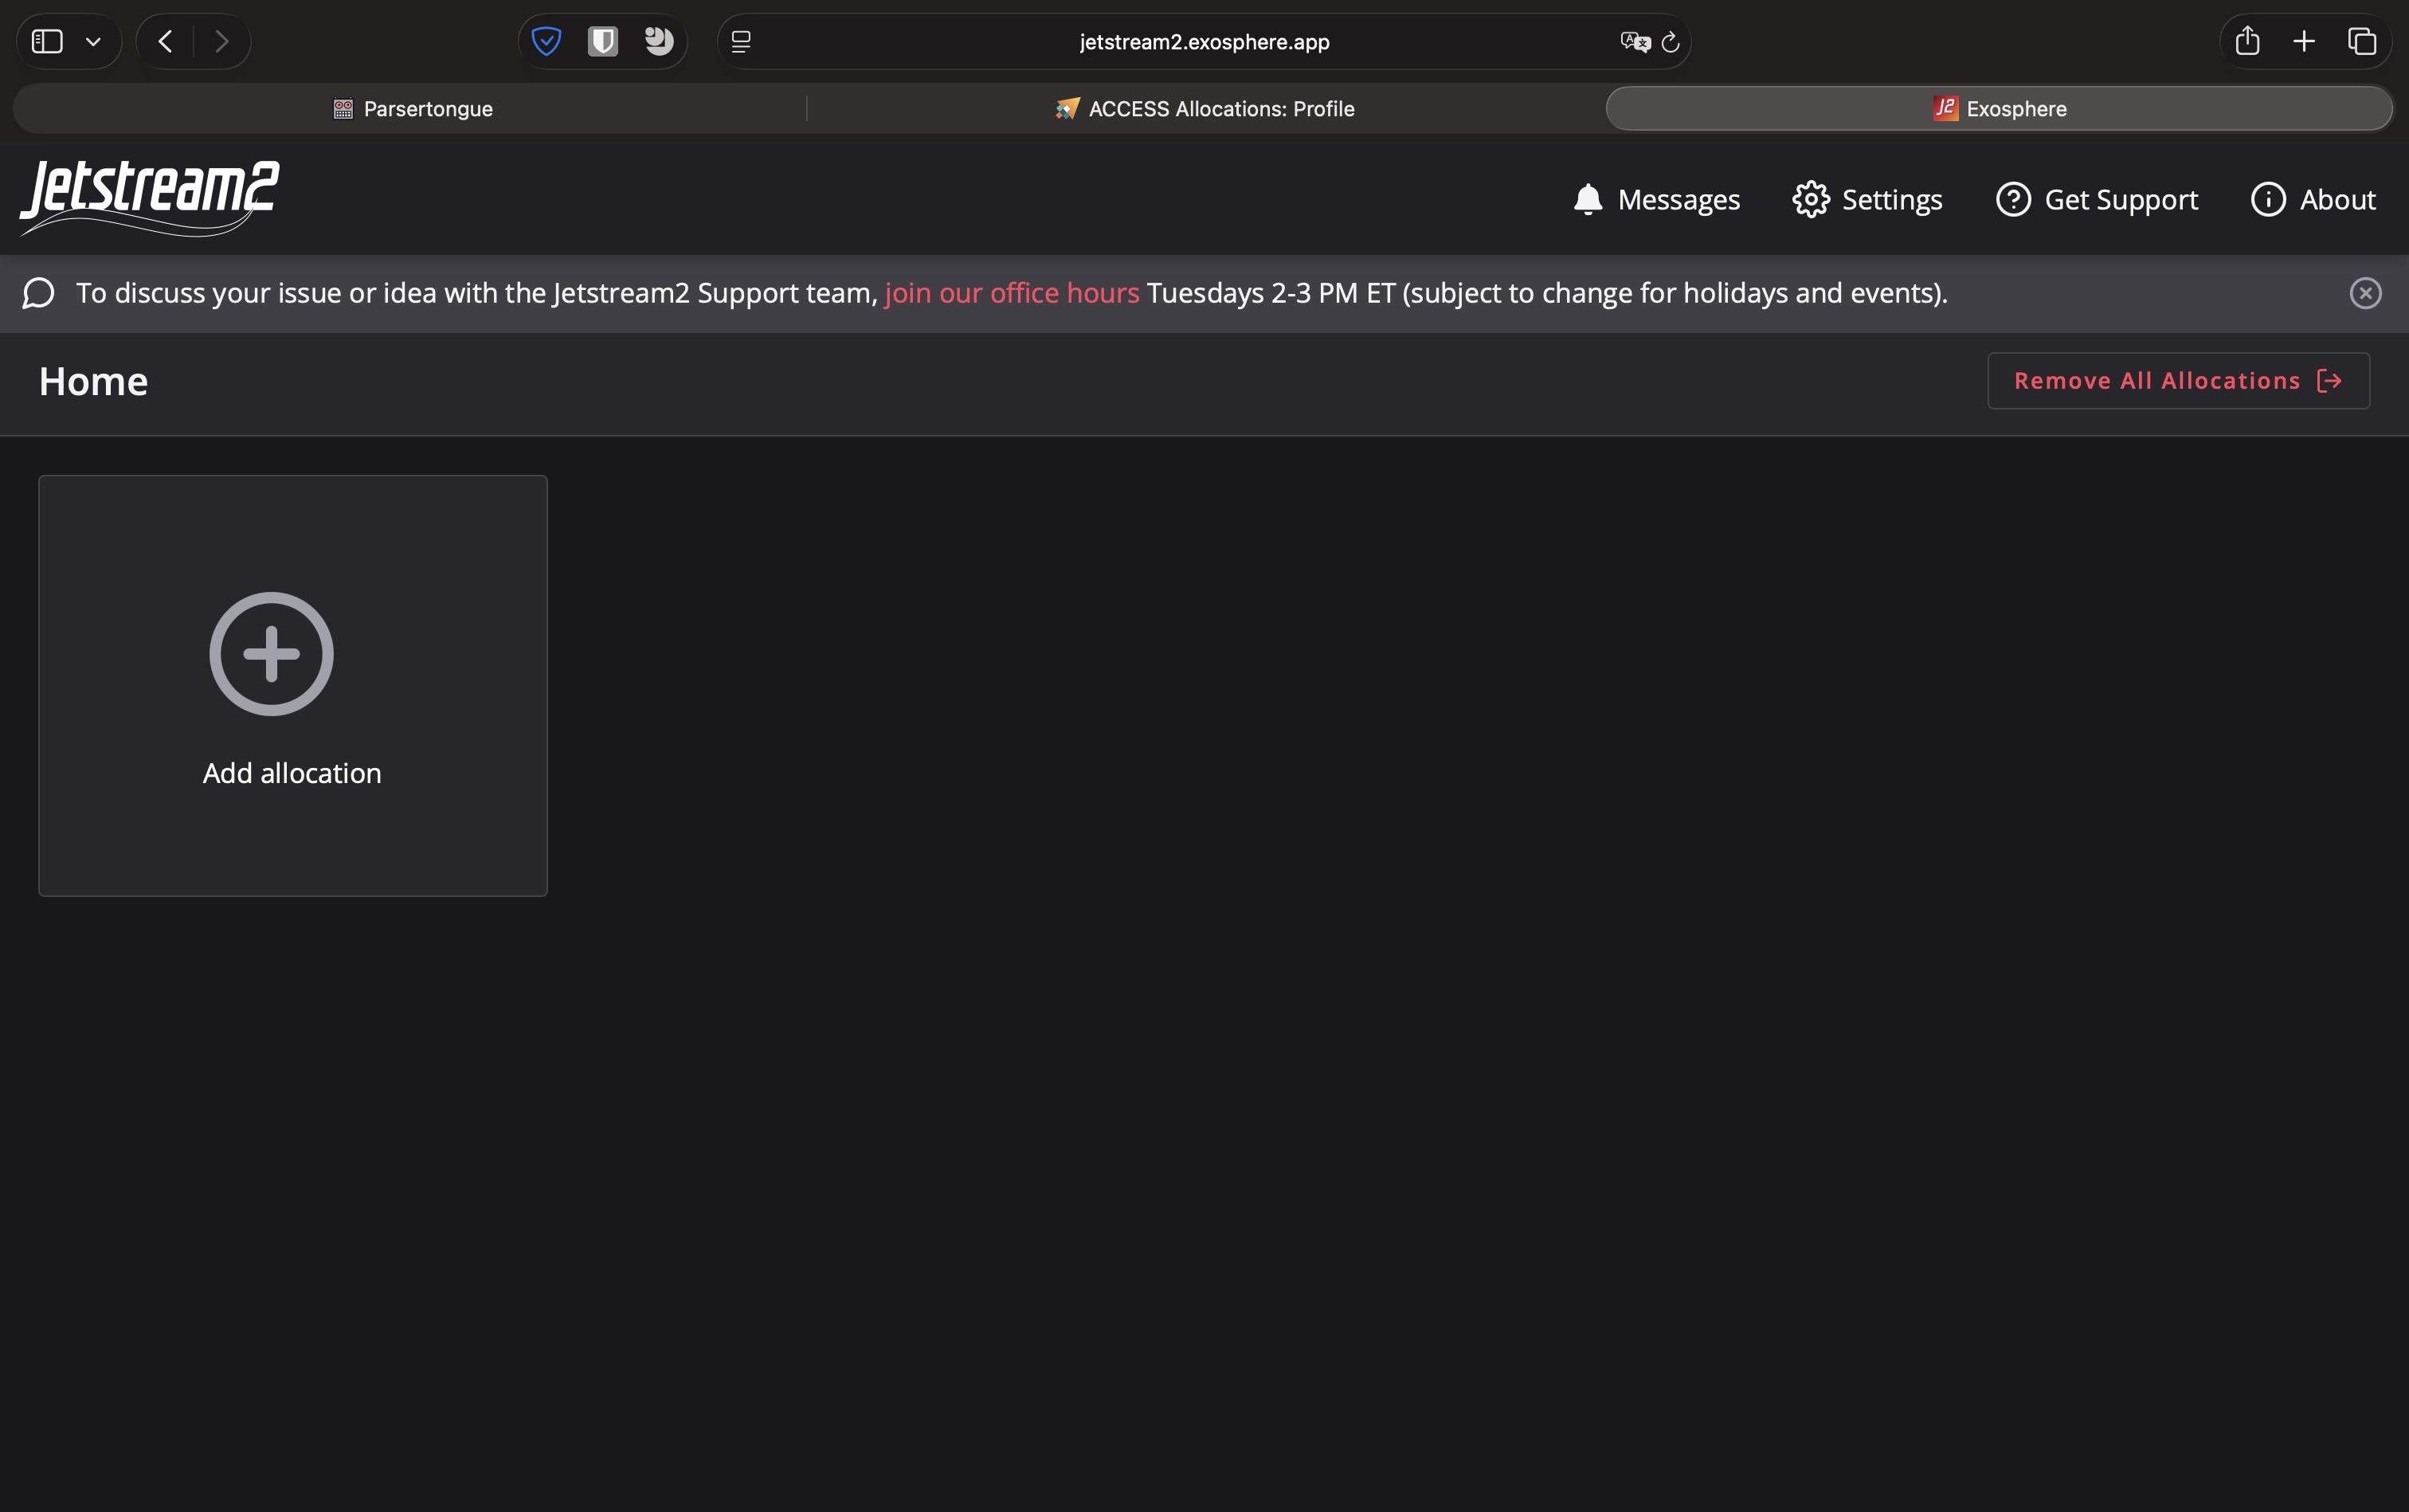
With you SSH key in hand, you can now begin configuring your instance. First, navigate to https://jetstream2.exosphere.app/exosphere/ . Initially you probaby won't see any allocations listed:
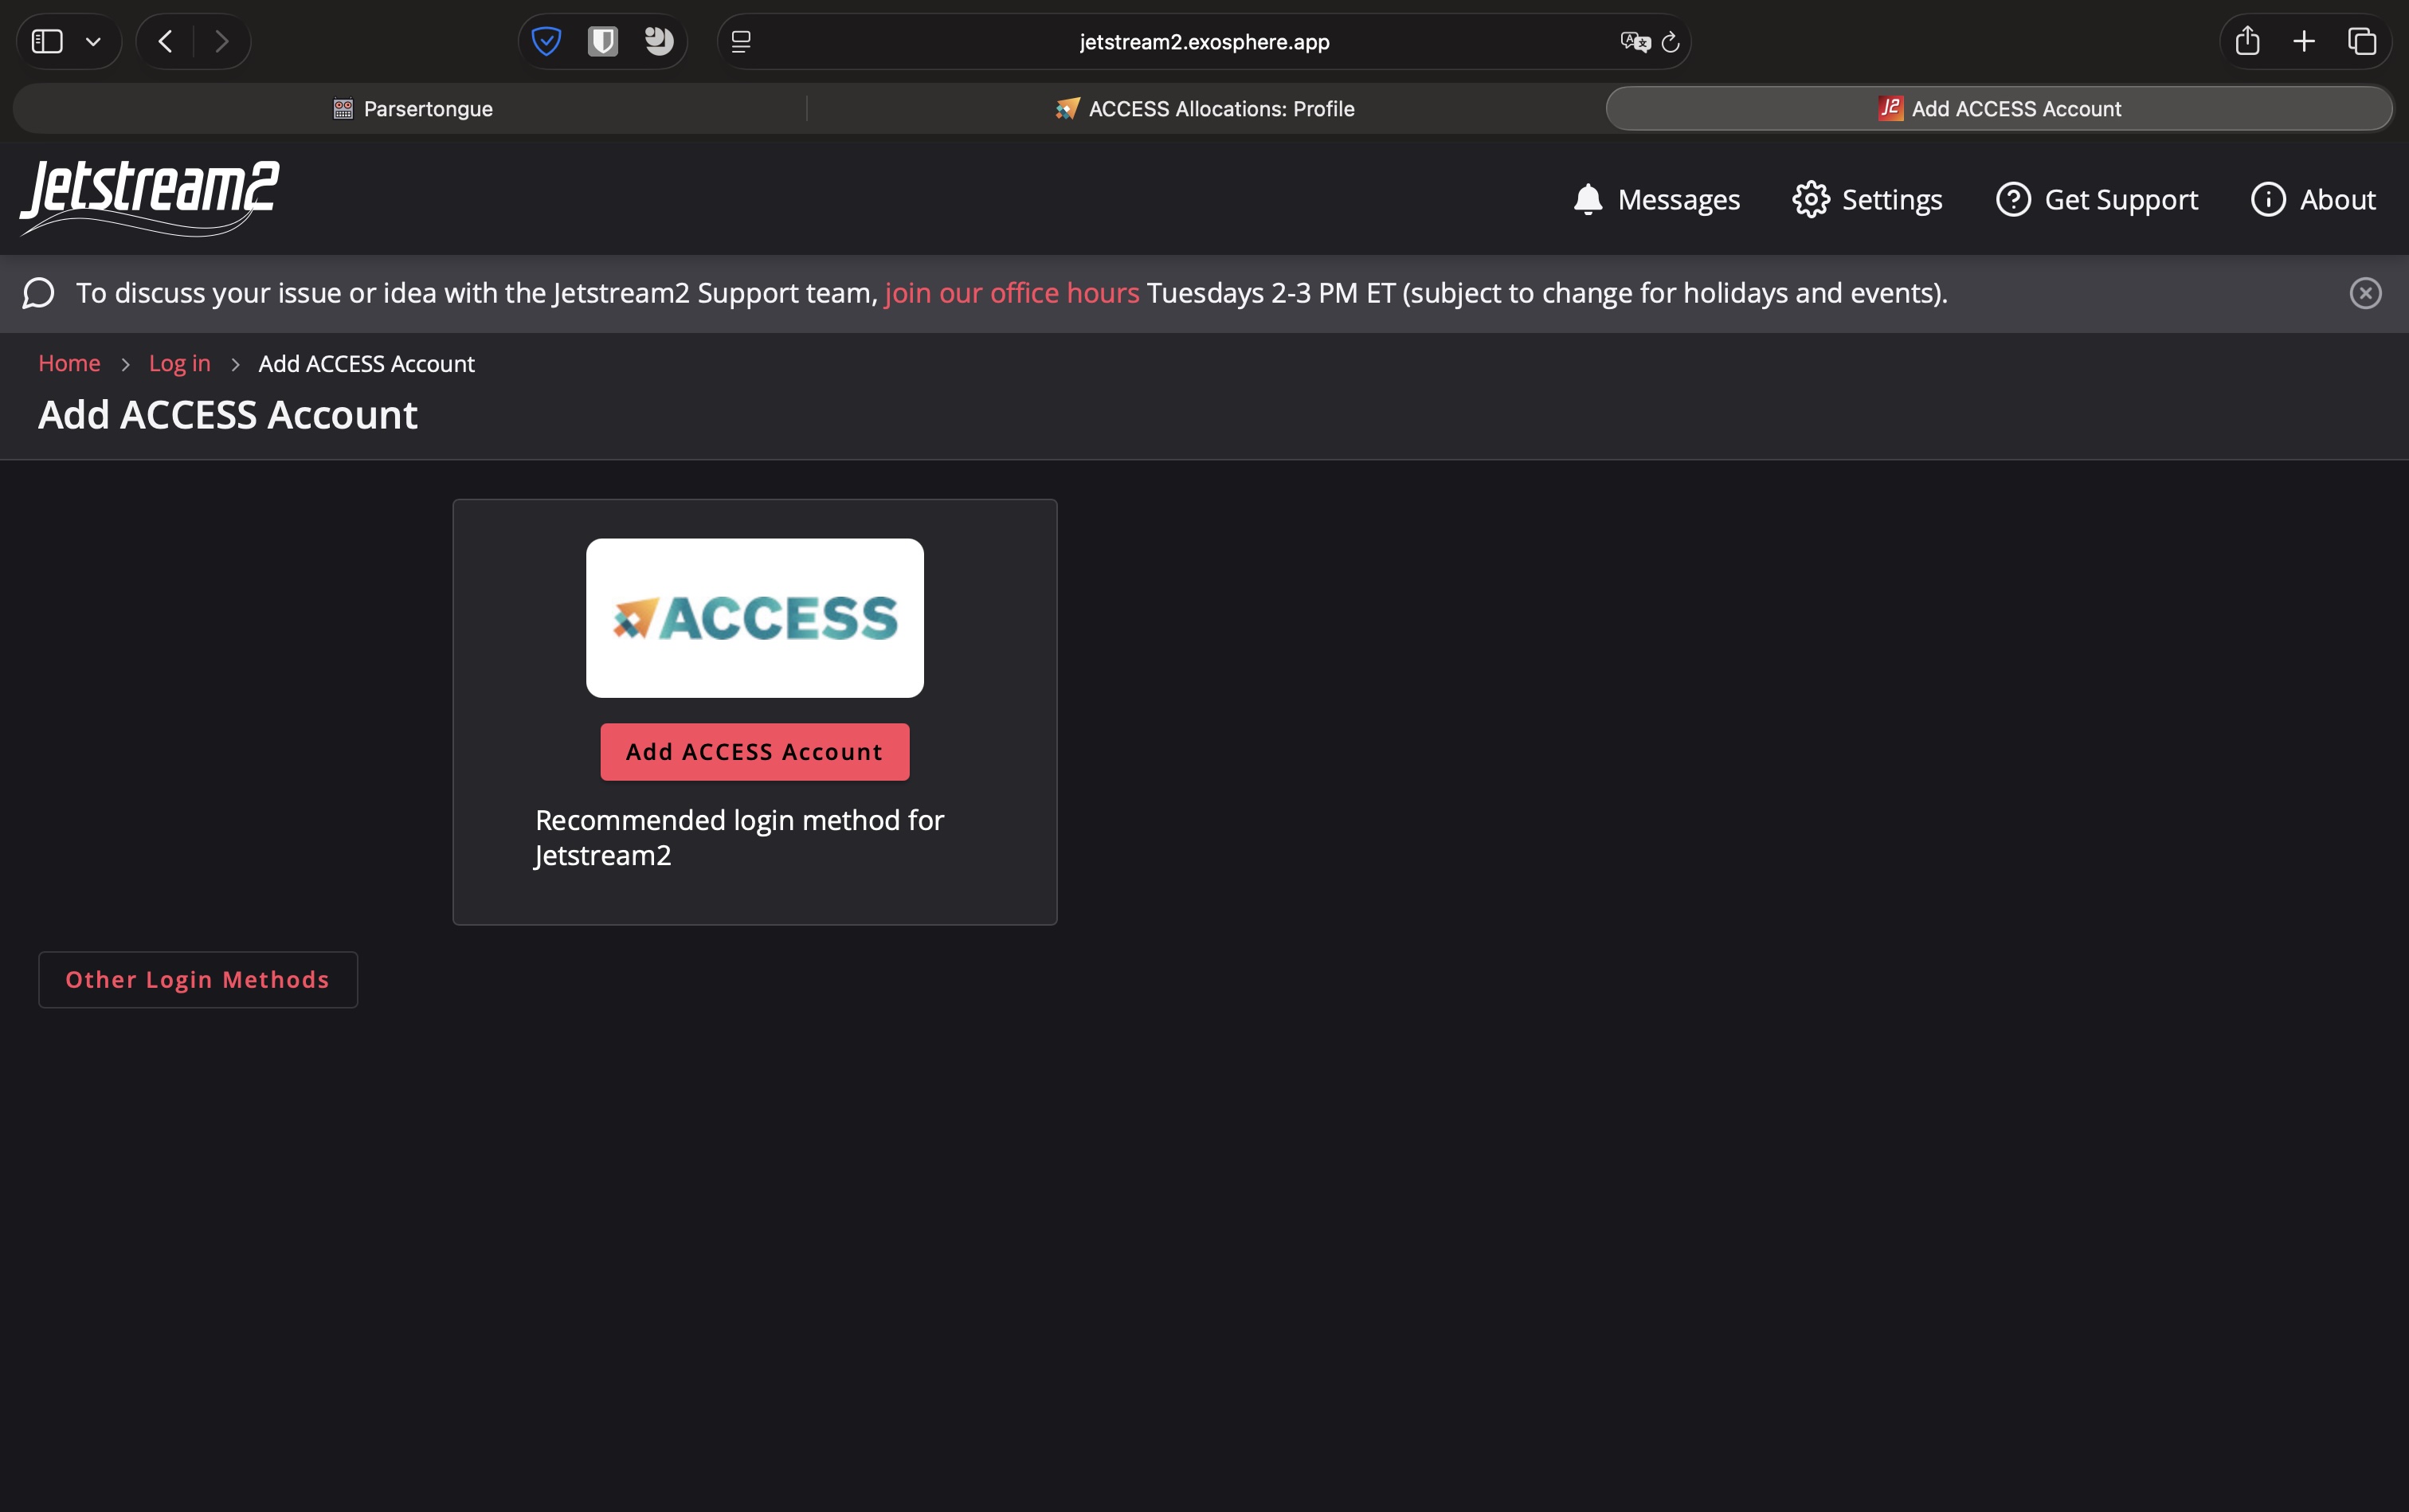
To add an allocation, select Add allocation and then Add ACCESS account:
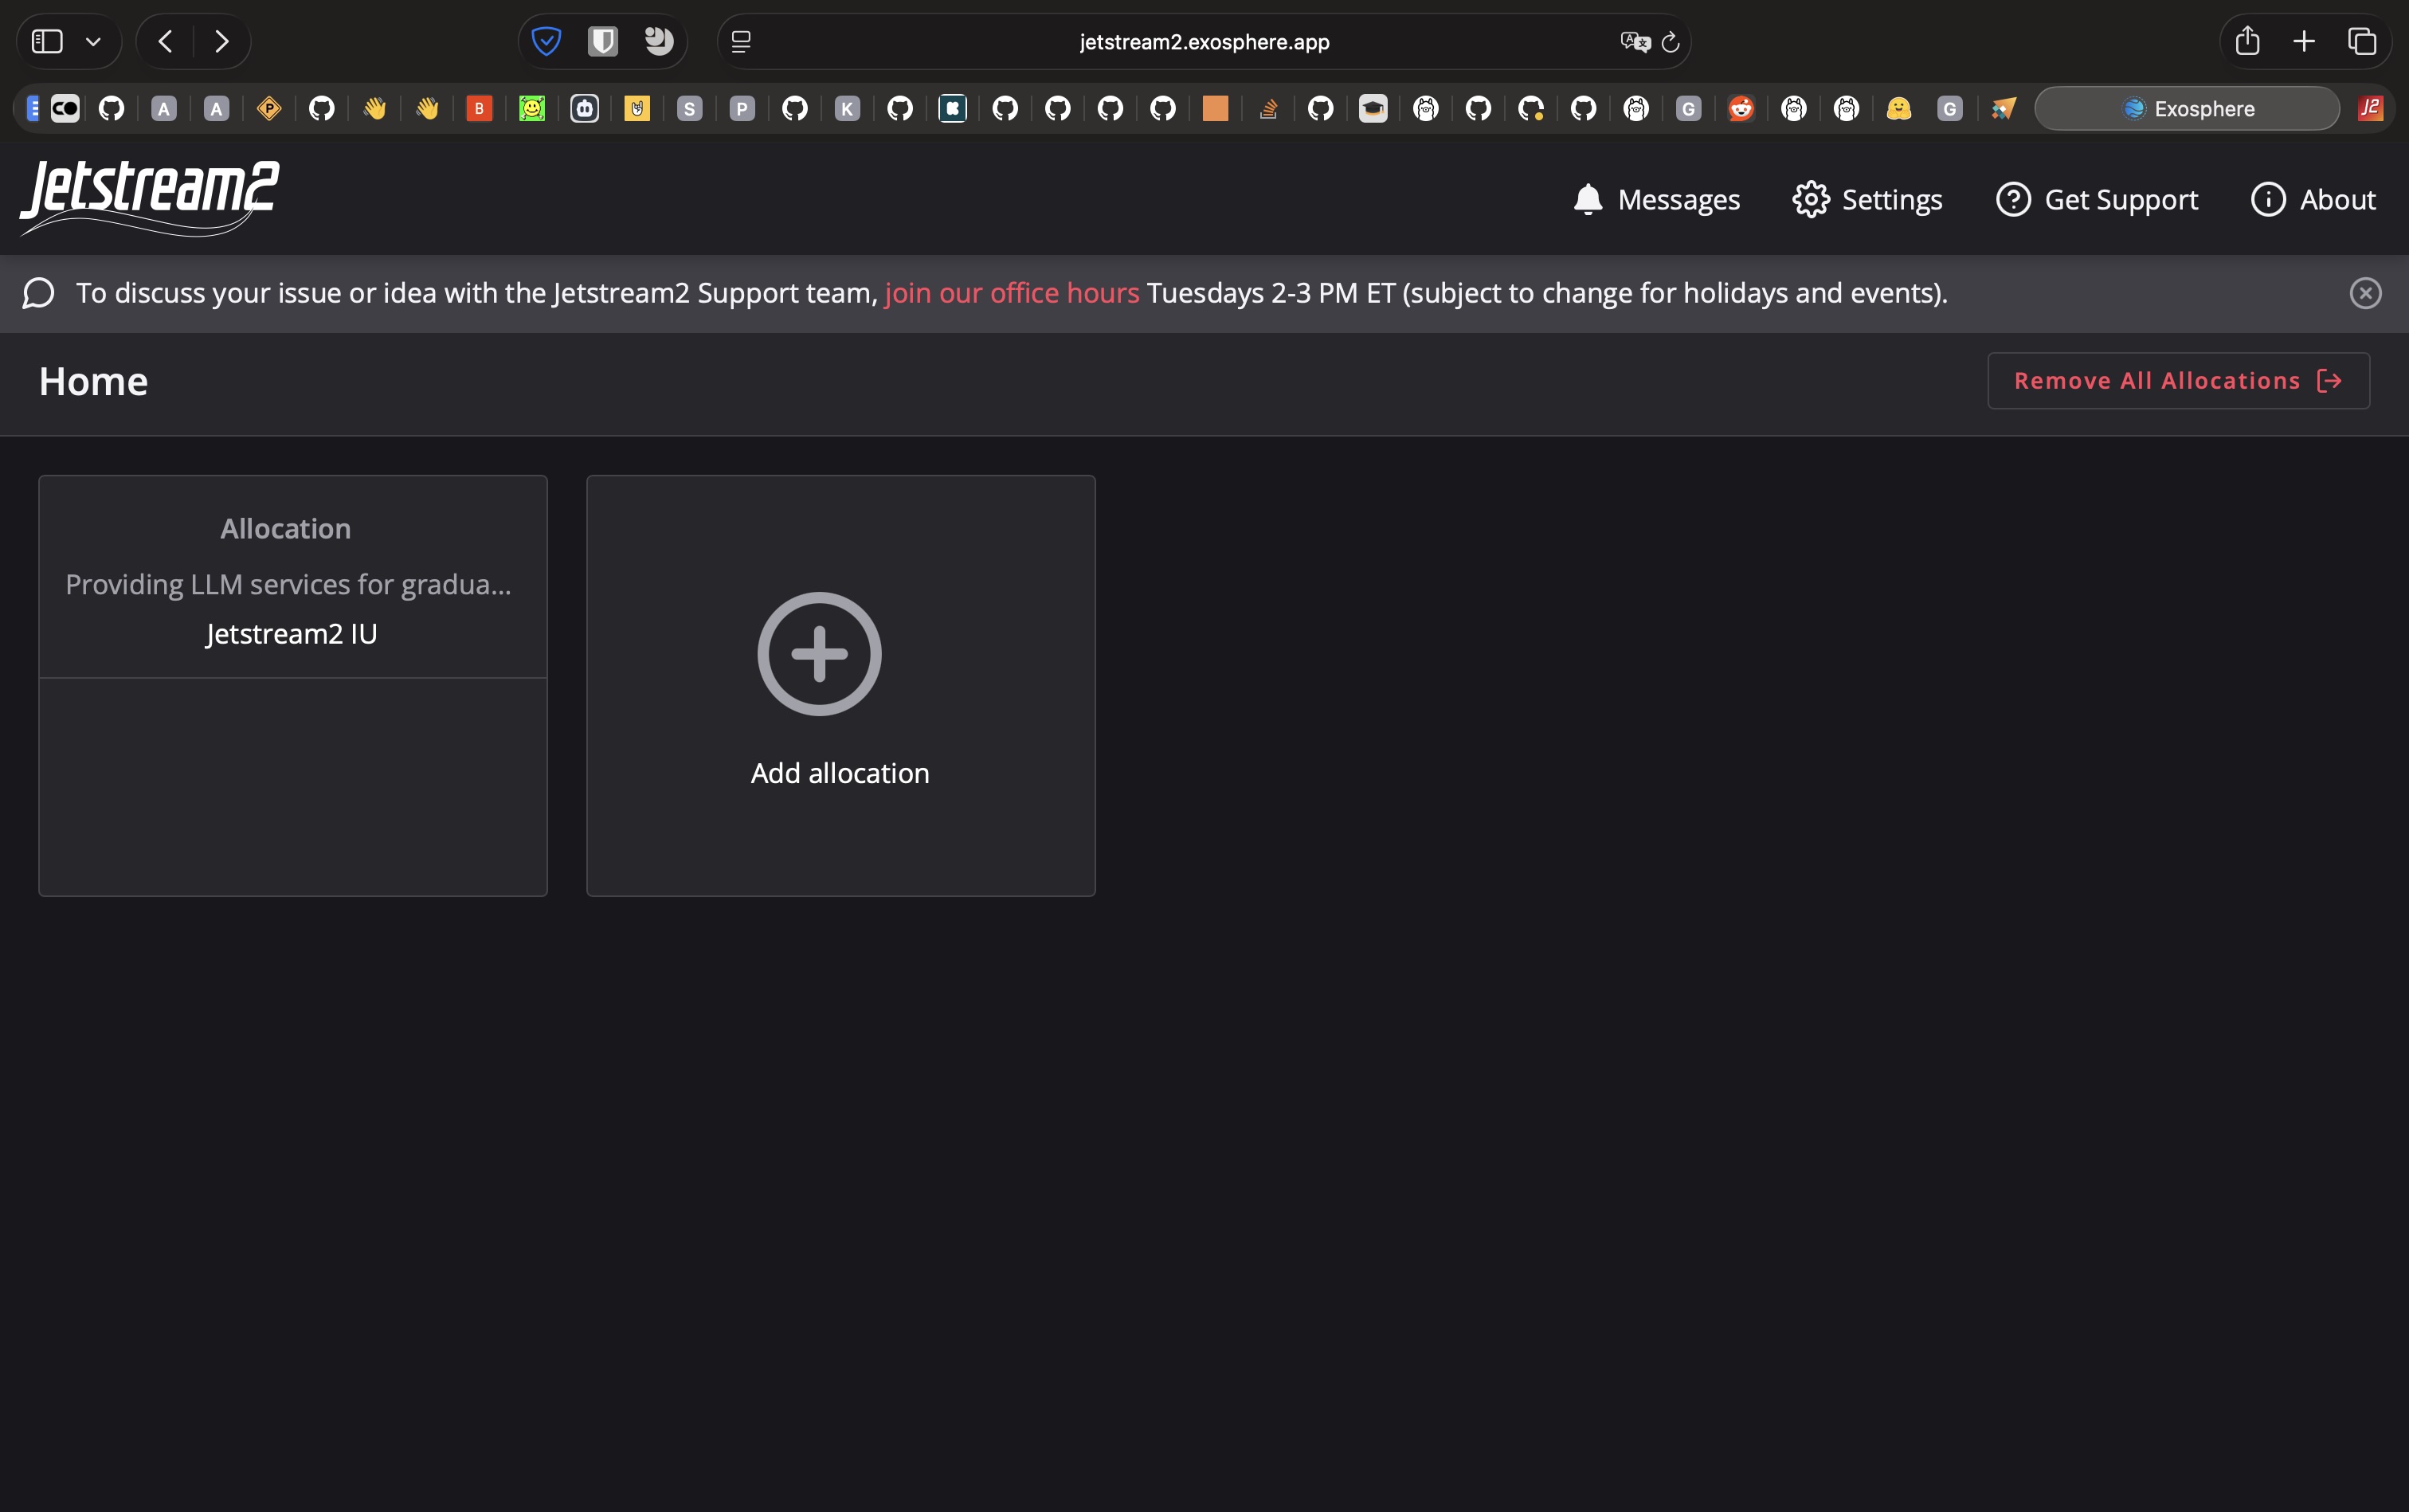
After completing the login step, you'll be redirected to https://jetstream2.exosphere.app/exosphere/. You should now see an available allocation. Select it by clicking on it:
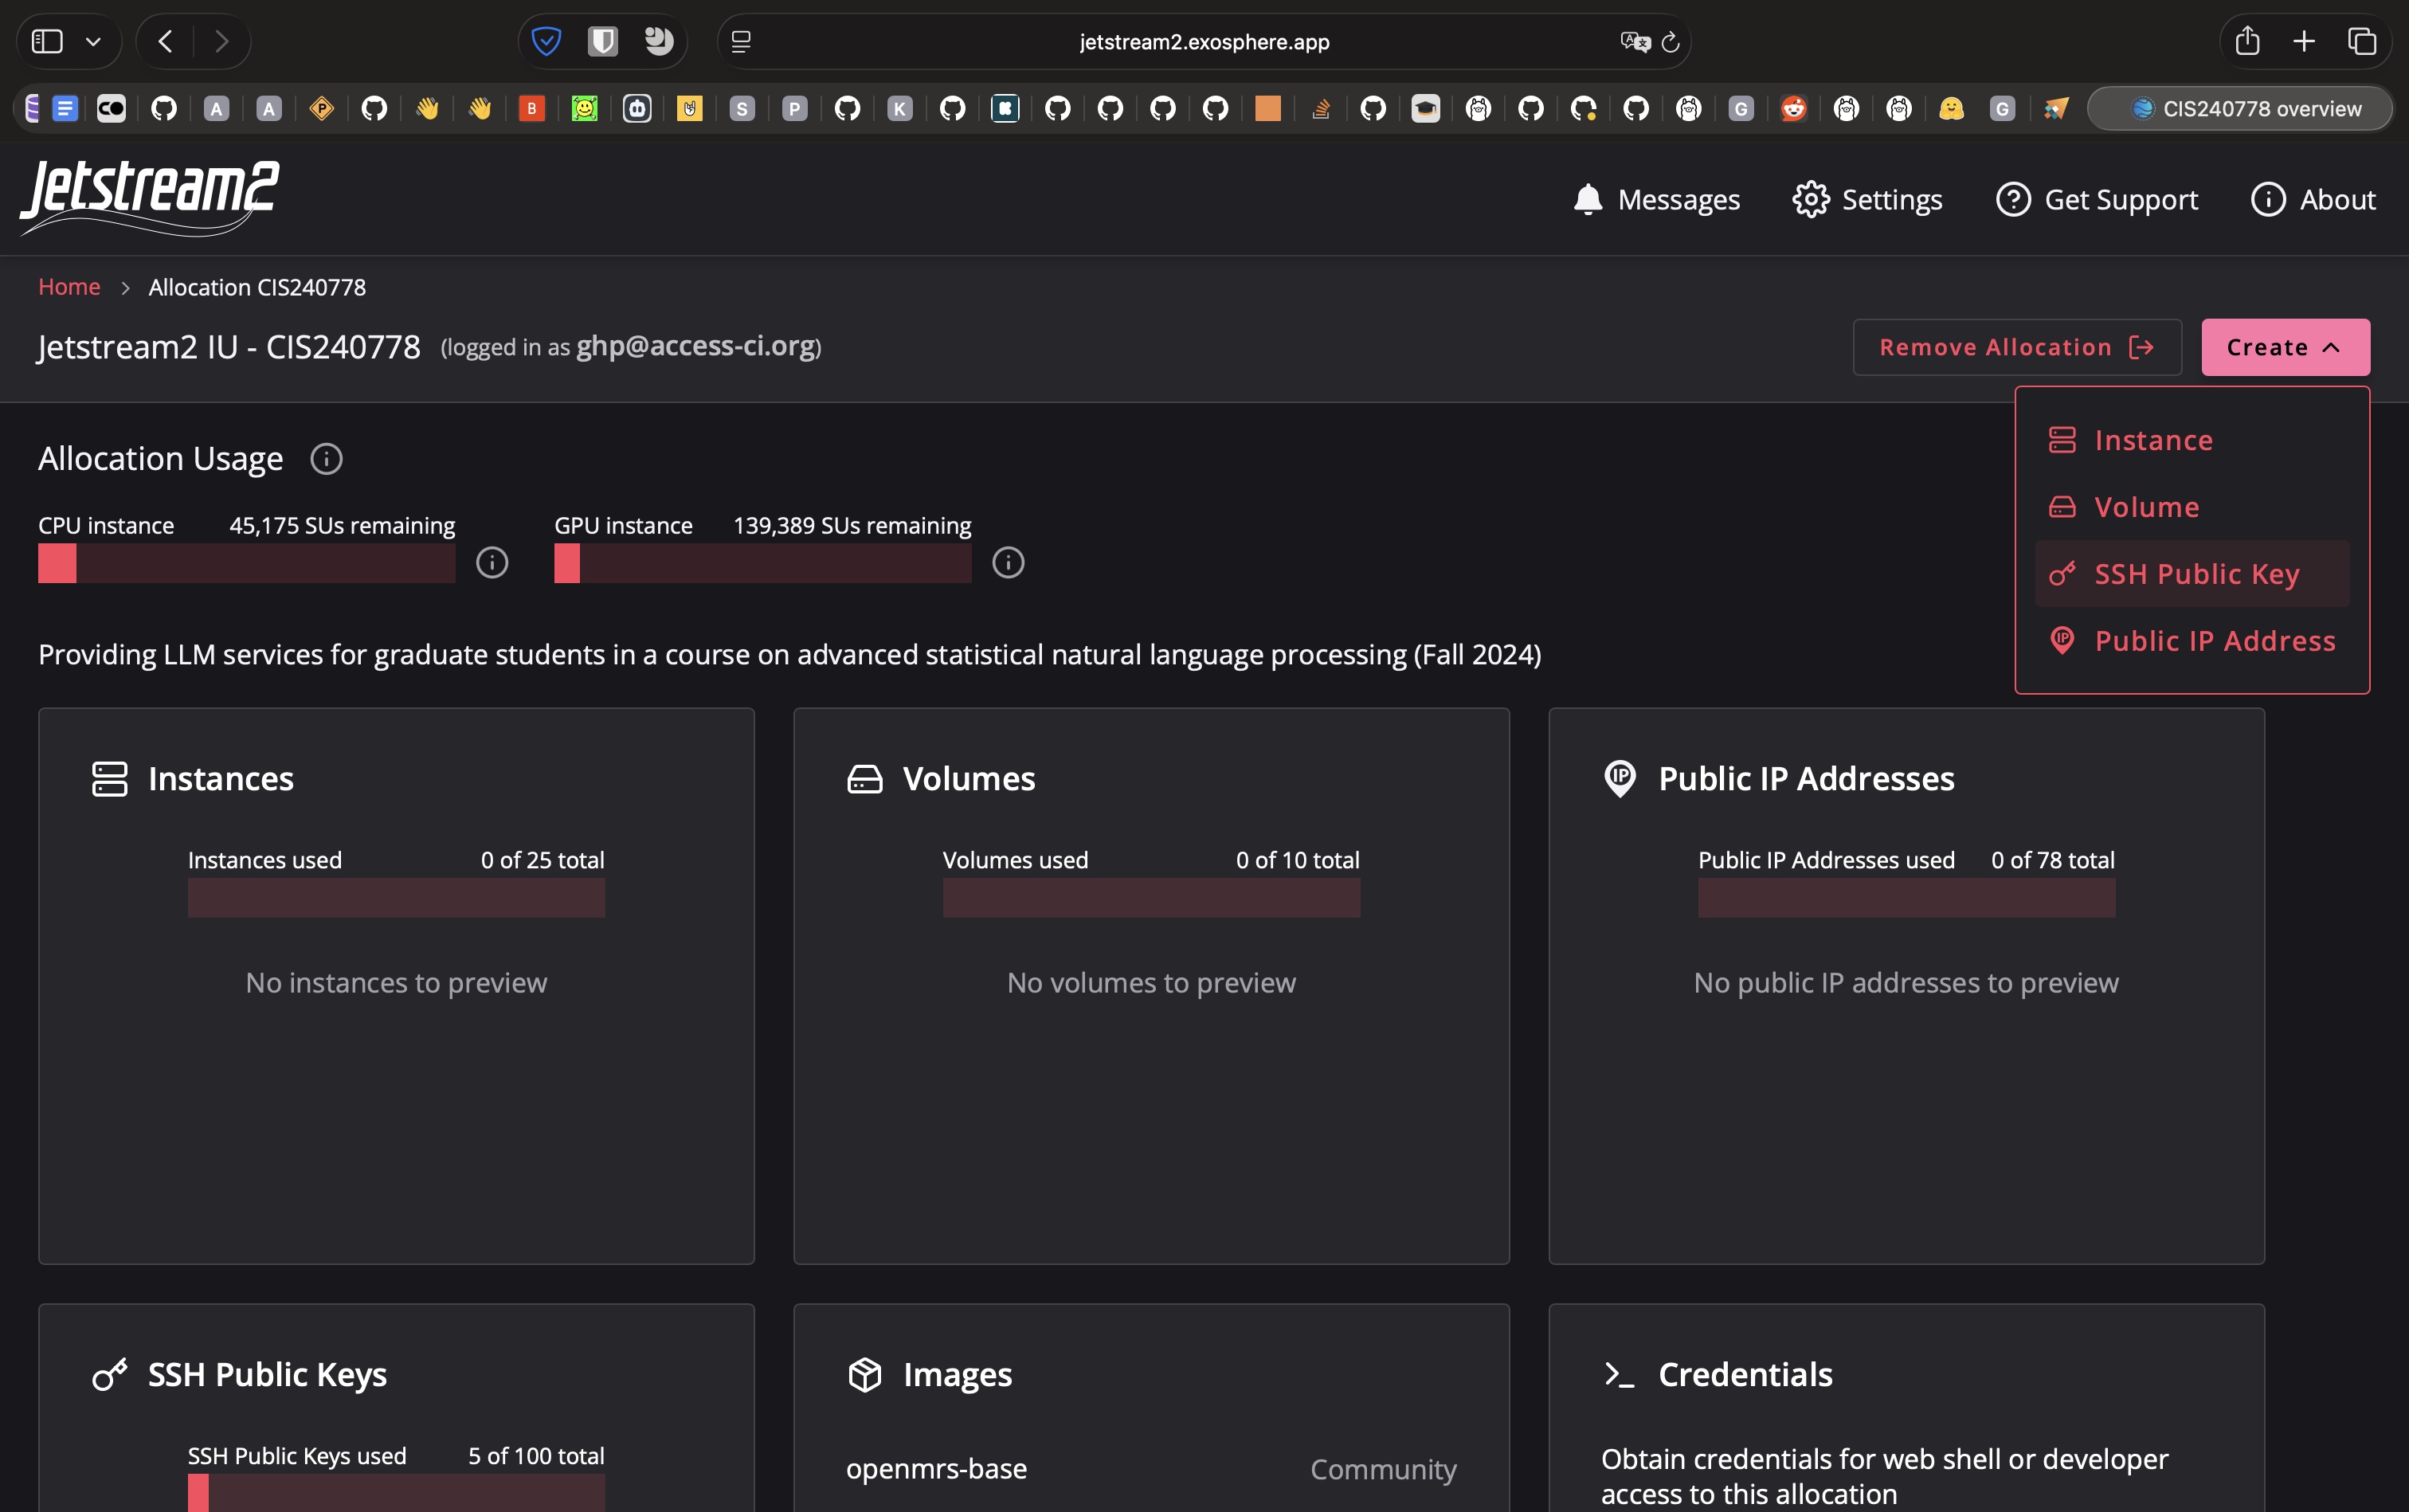
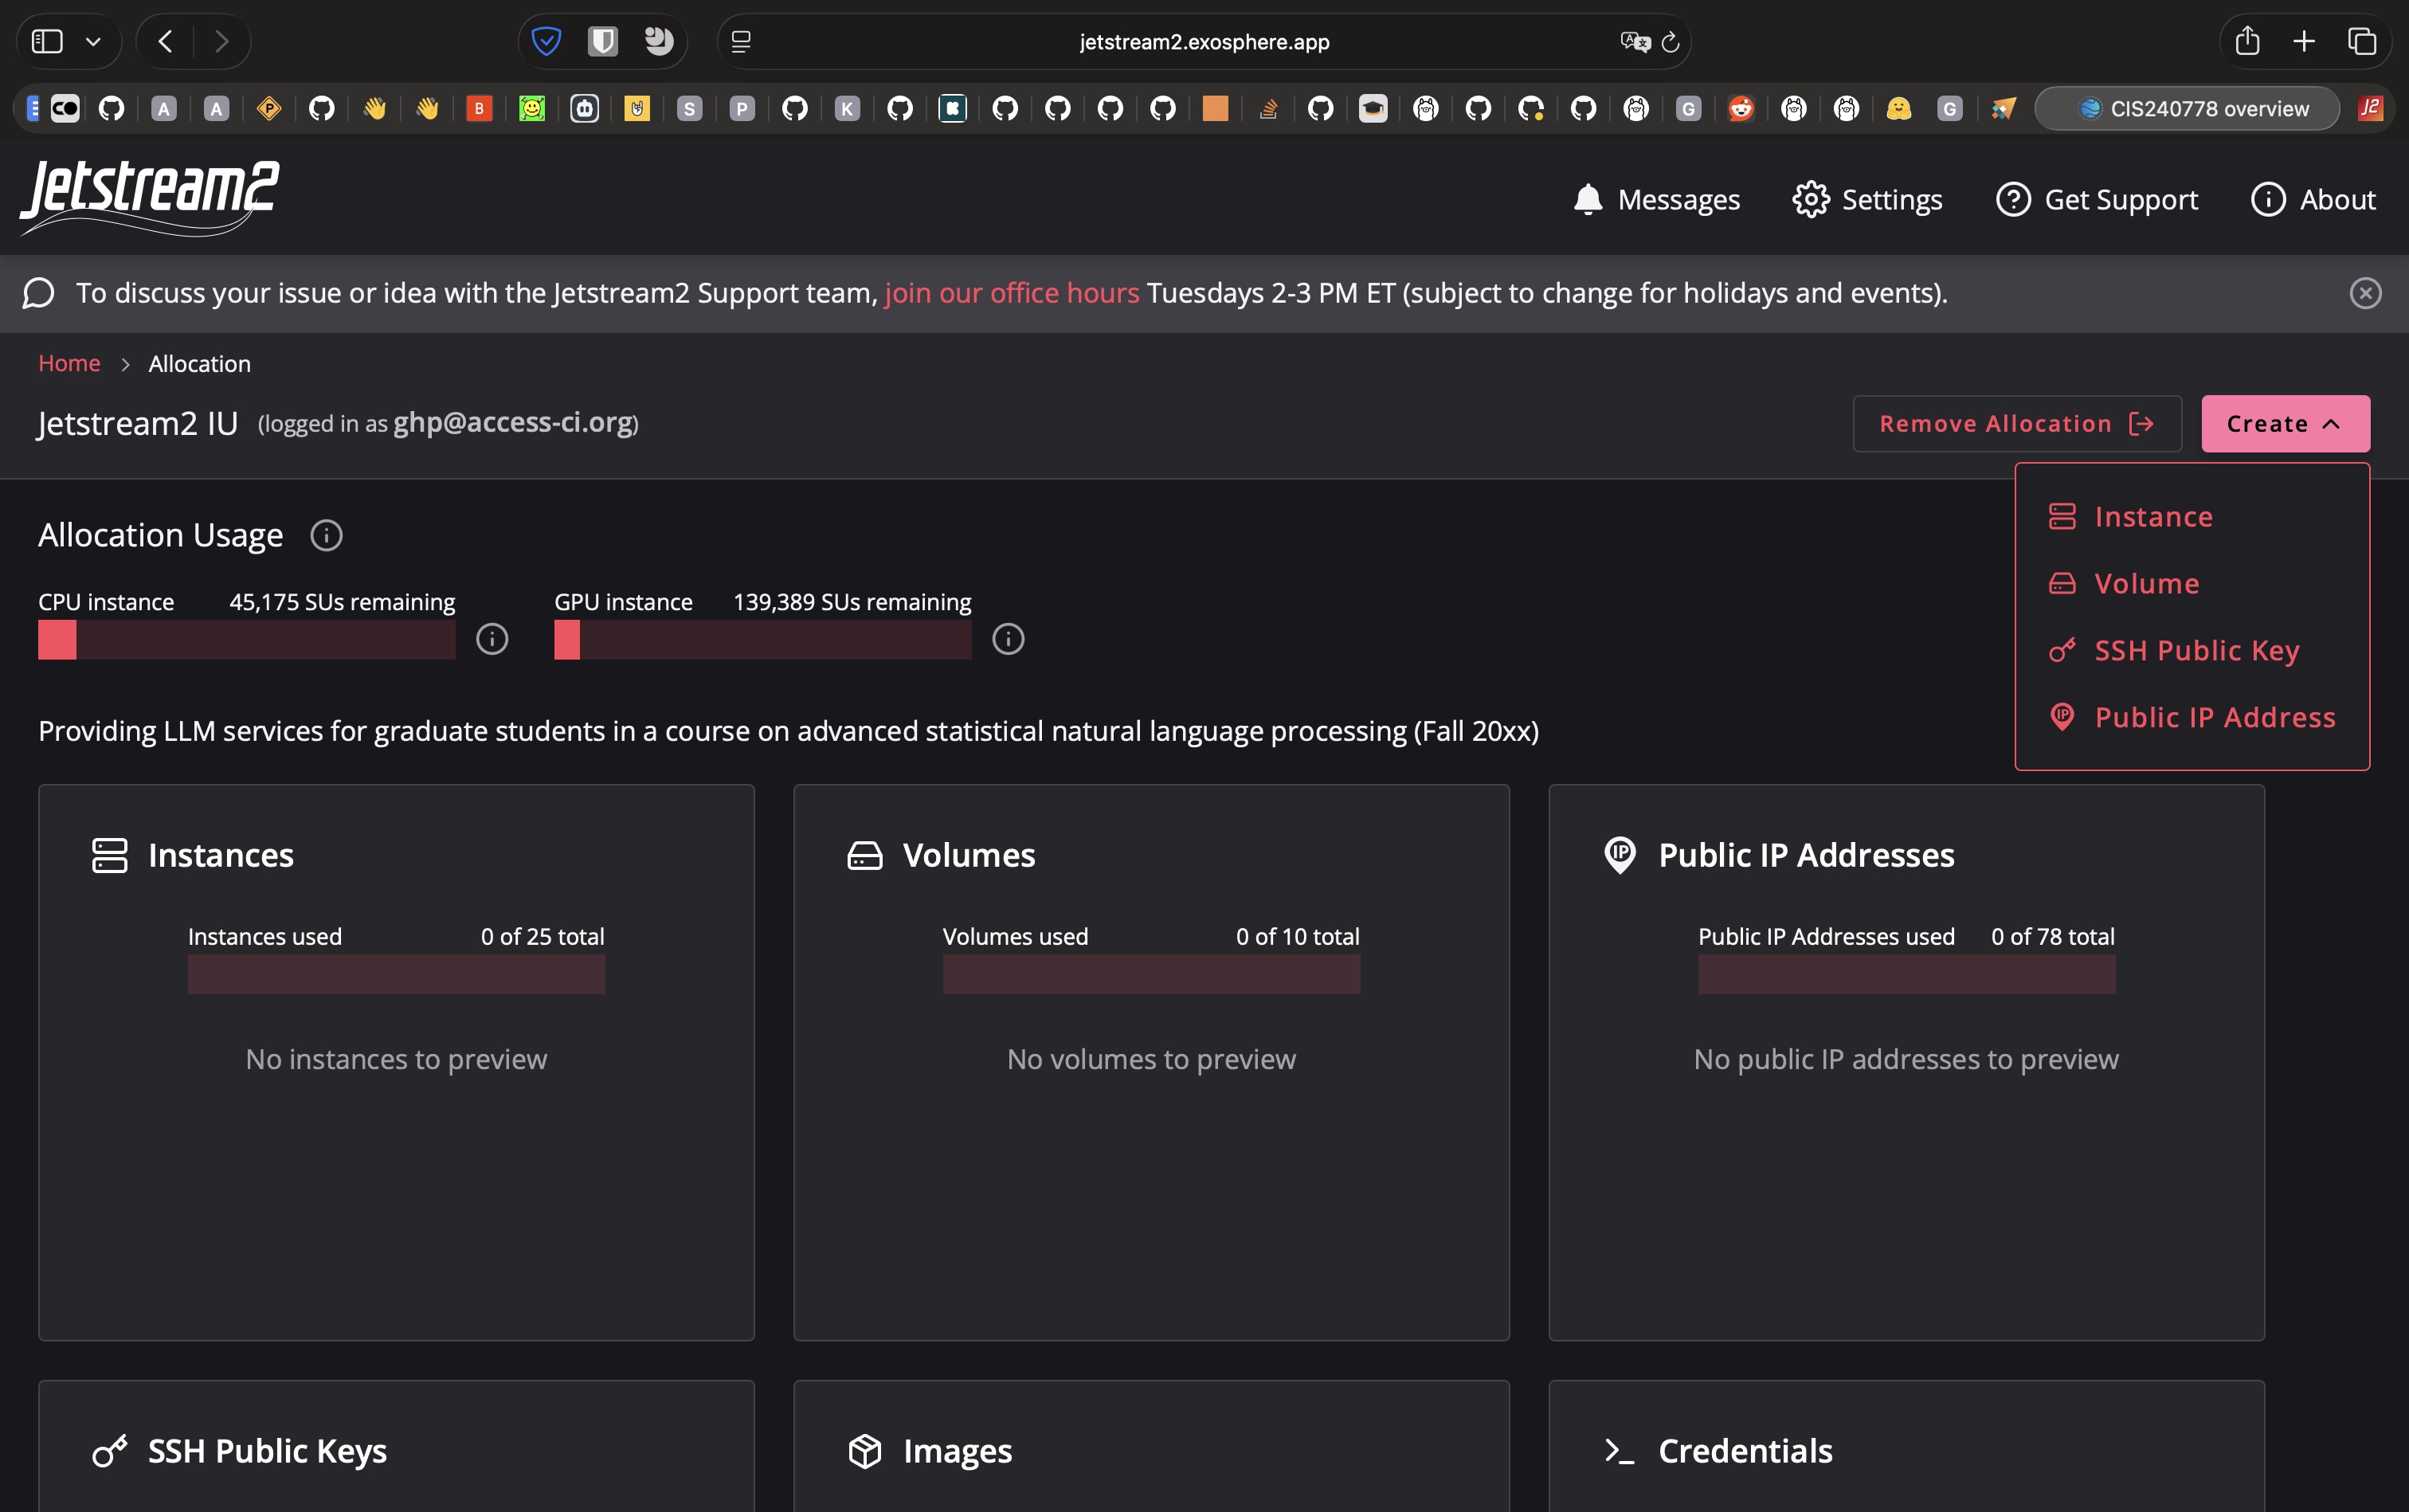
You'll be redirected to a view with an overview of available resources. In the top right-hand corner, click Create and select SSH Public Key from the dropdown that appears:
In the next screen, you'll add your public SSH key that you created in Part 1. Paste in the complete contents of your .pub file. Give your uploaded key a name (ex. your ACCESS ID or your Net ID), so that you'll be able to easily recognize it when configuring your instance:
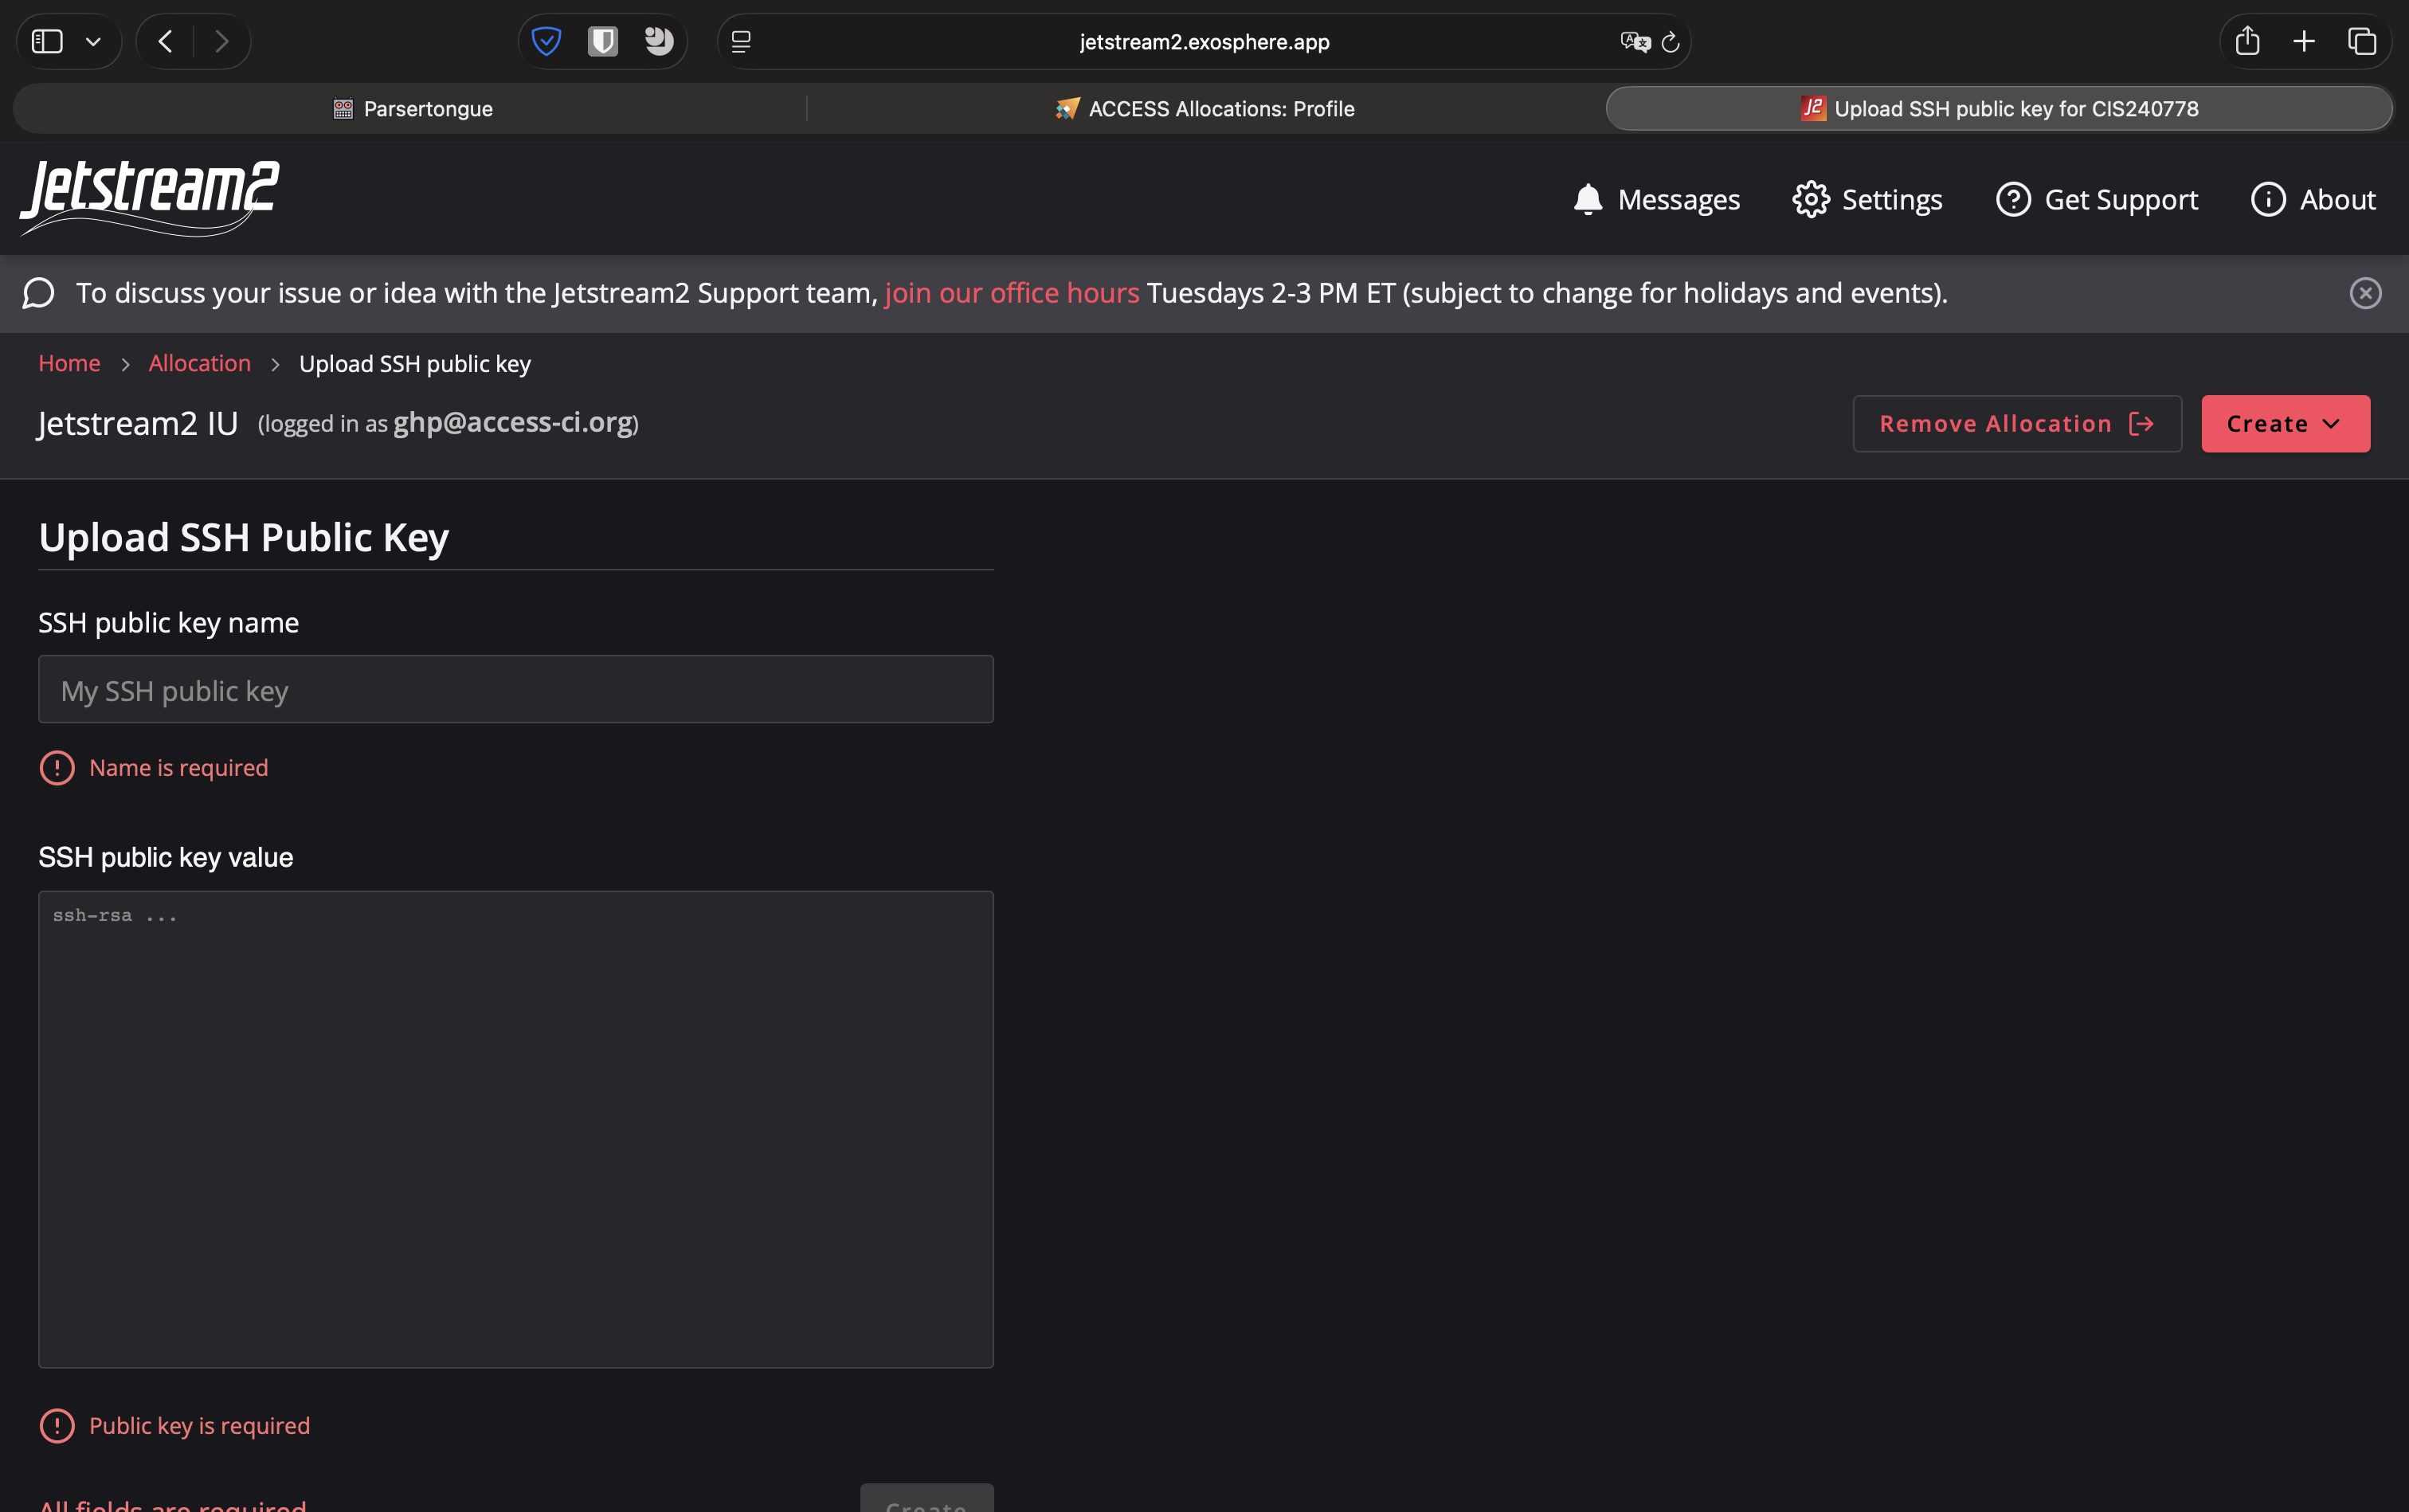
You're now ready to configure and launch your first instance.
Part 2: Configuring an instance
From the Create dropdown menu, select Instance:
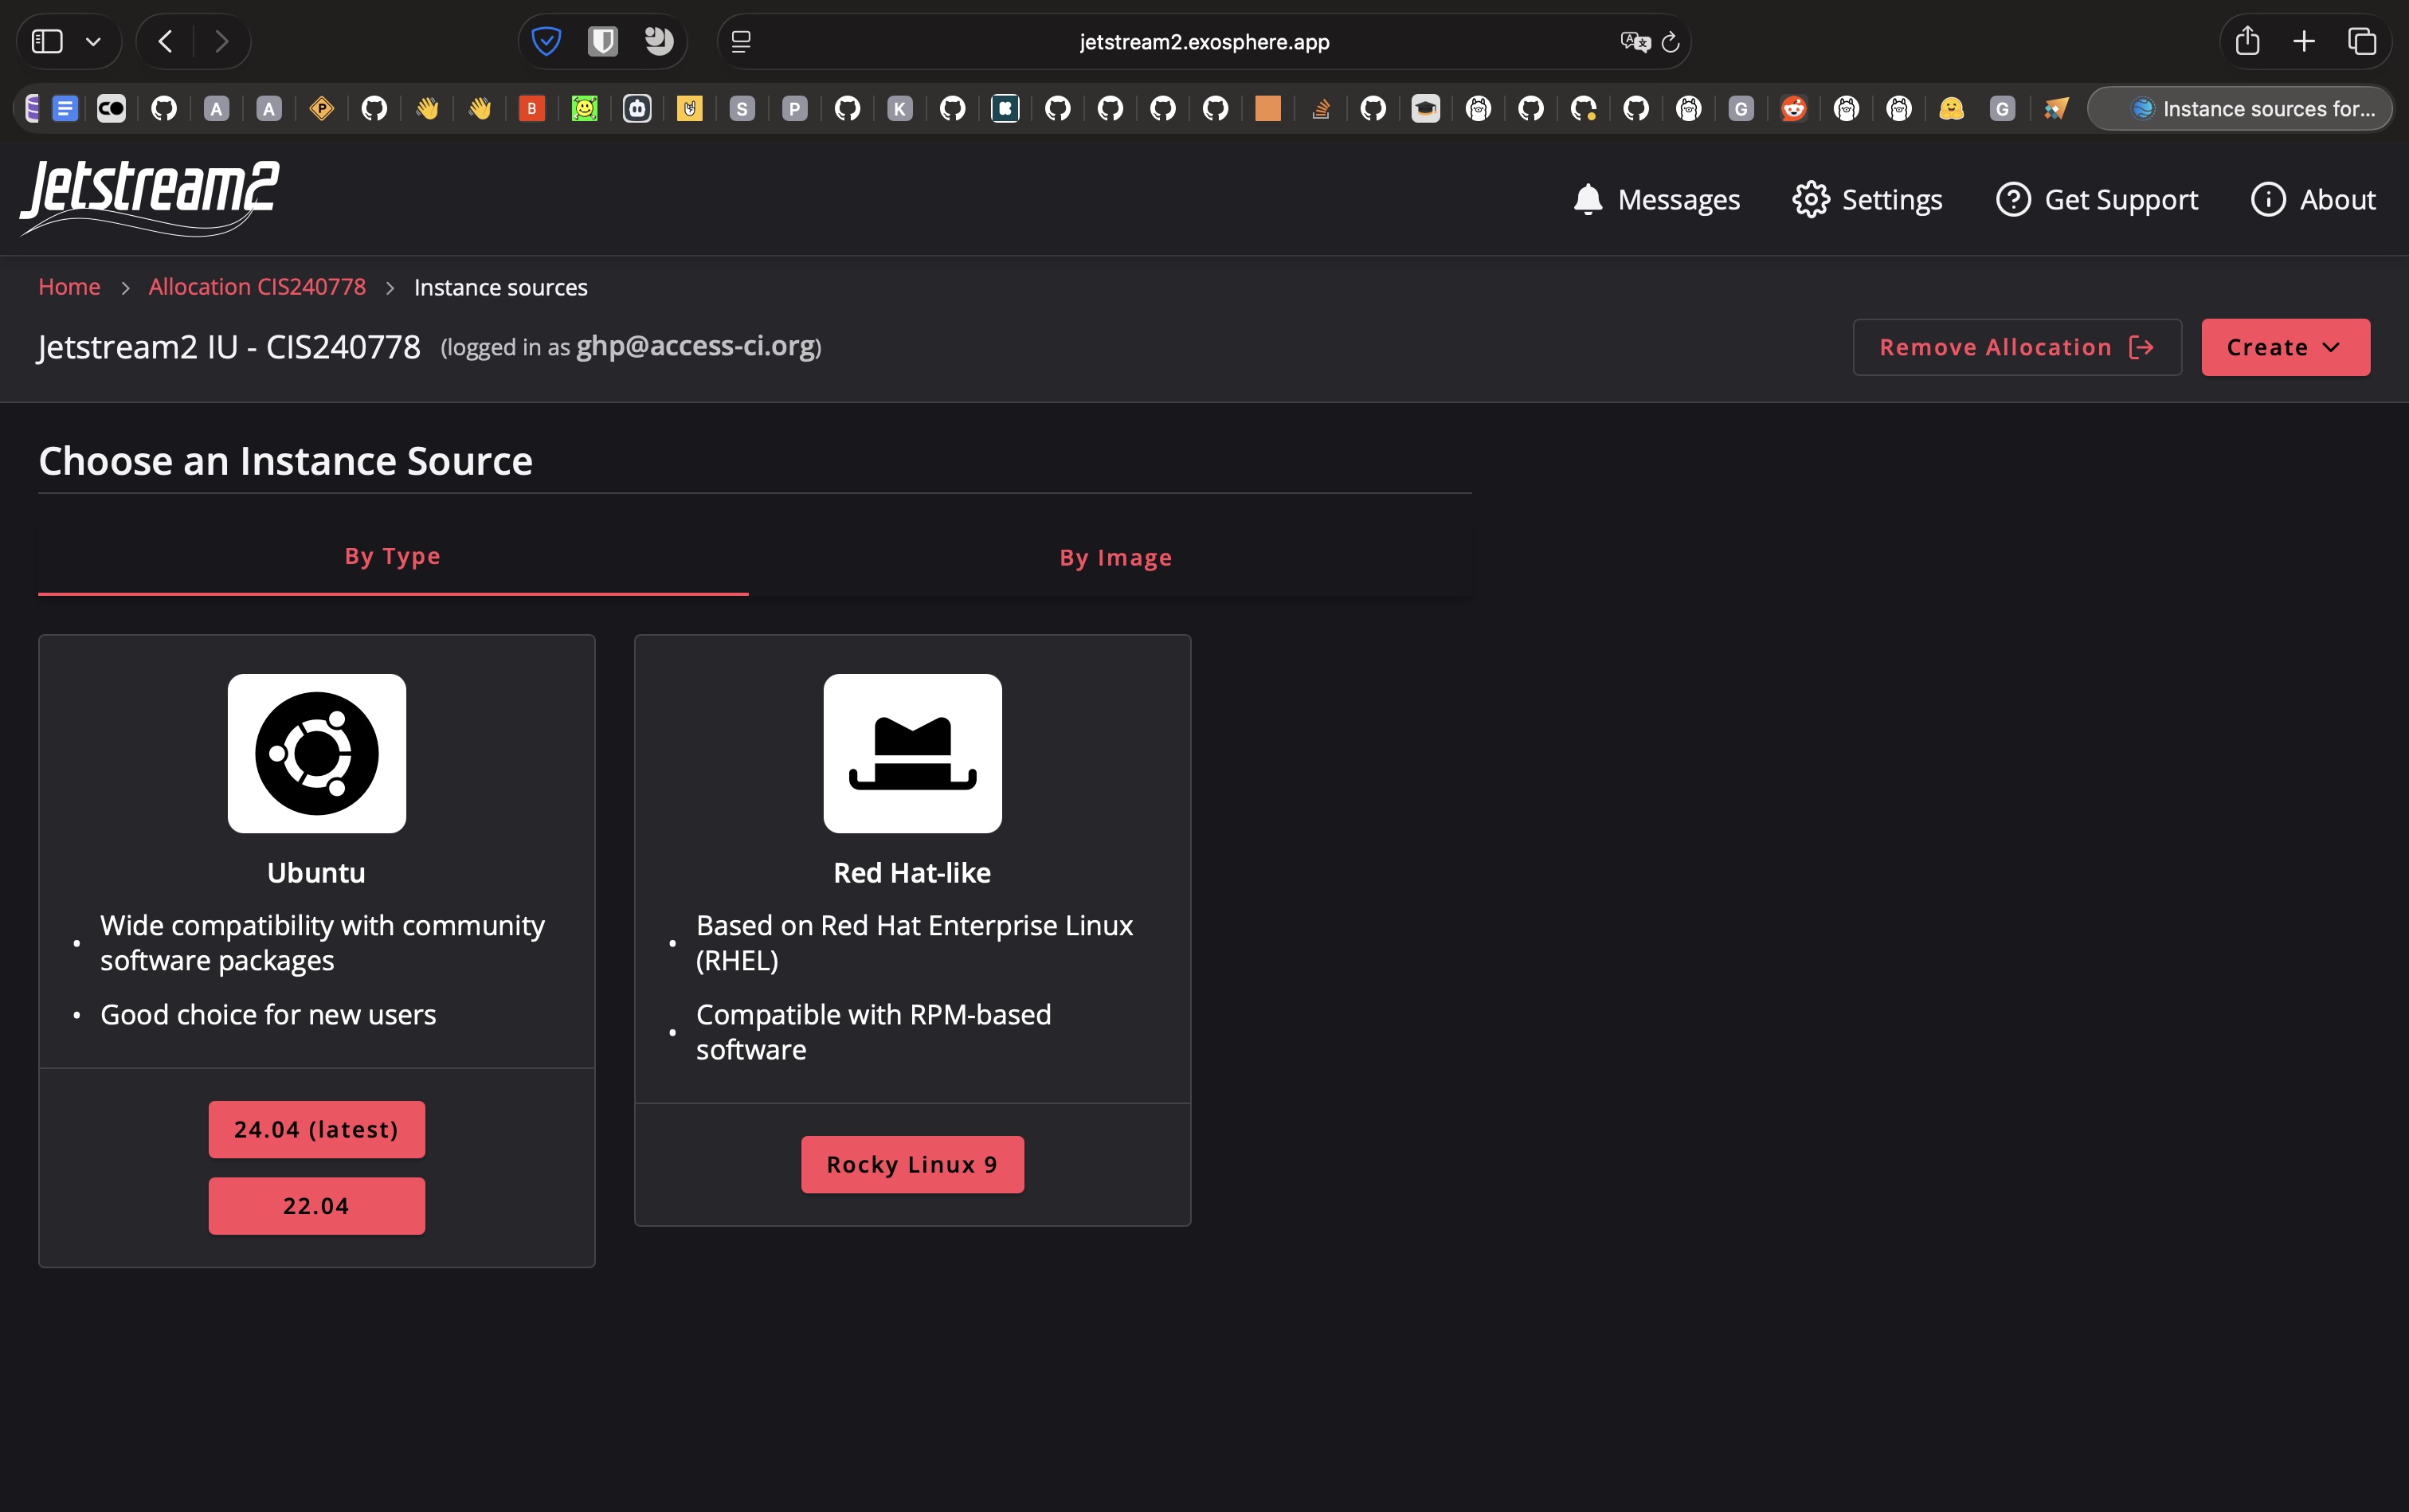
In the new view, select an instance "source":
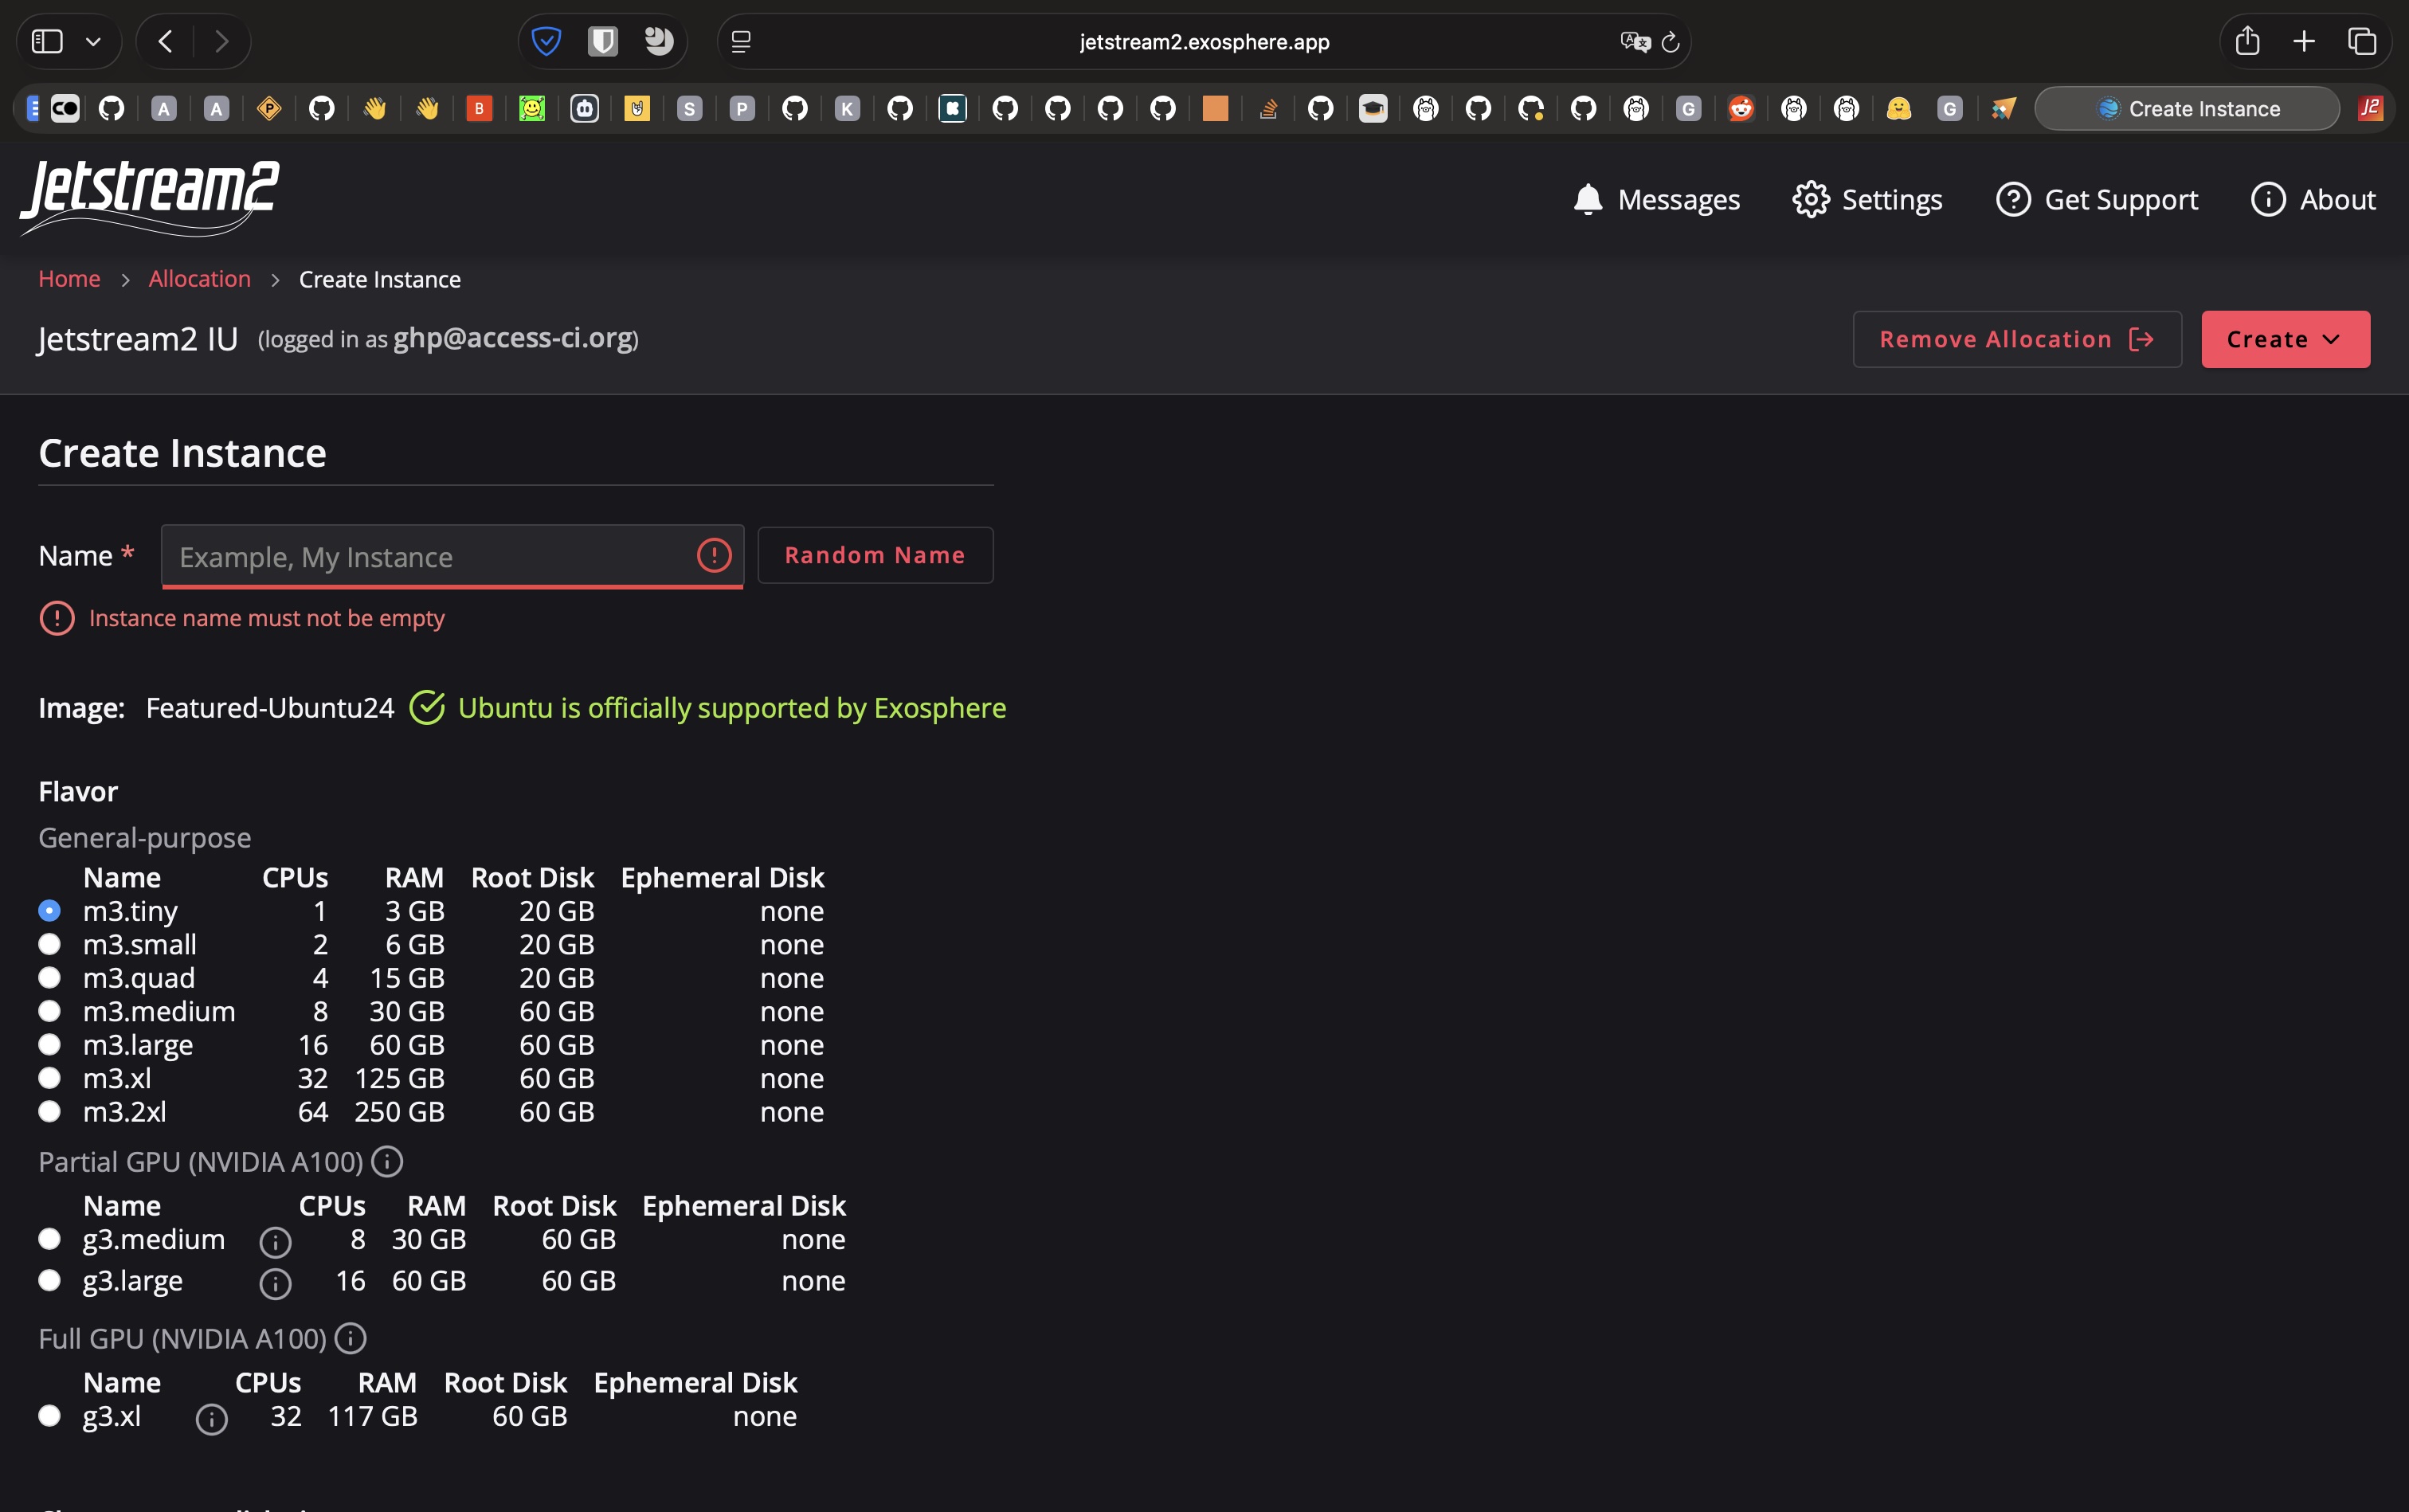
Next, name your instance and select an instance type ("flavor"):
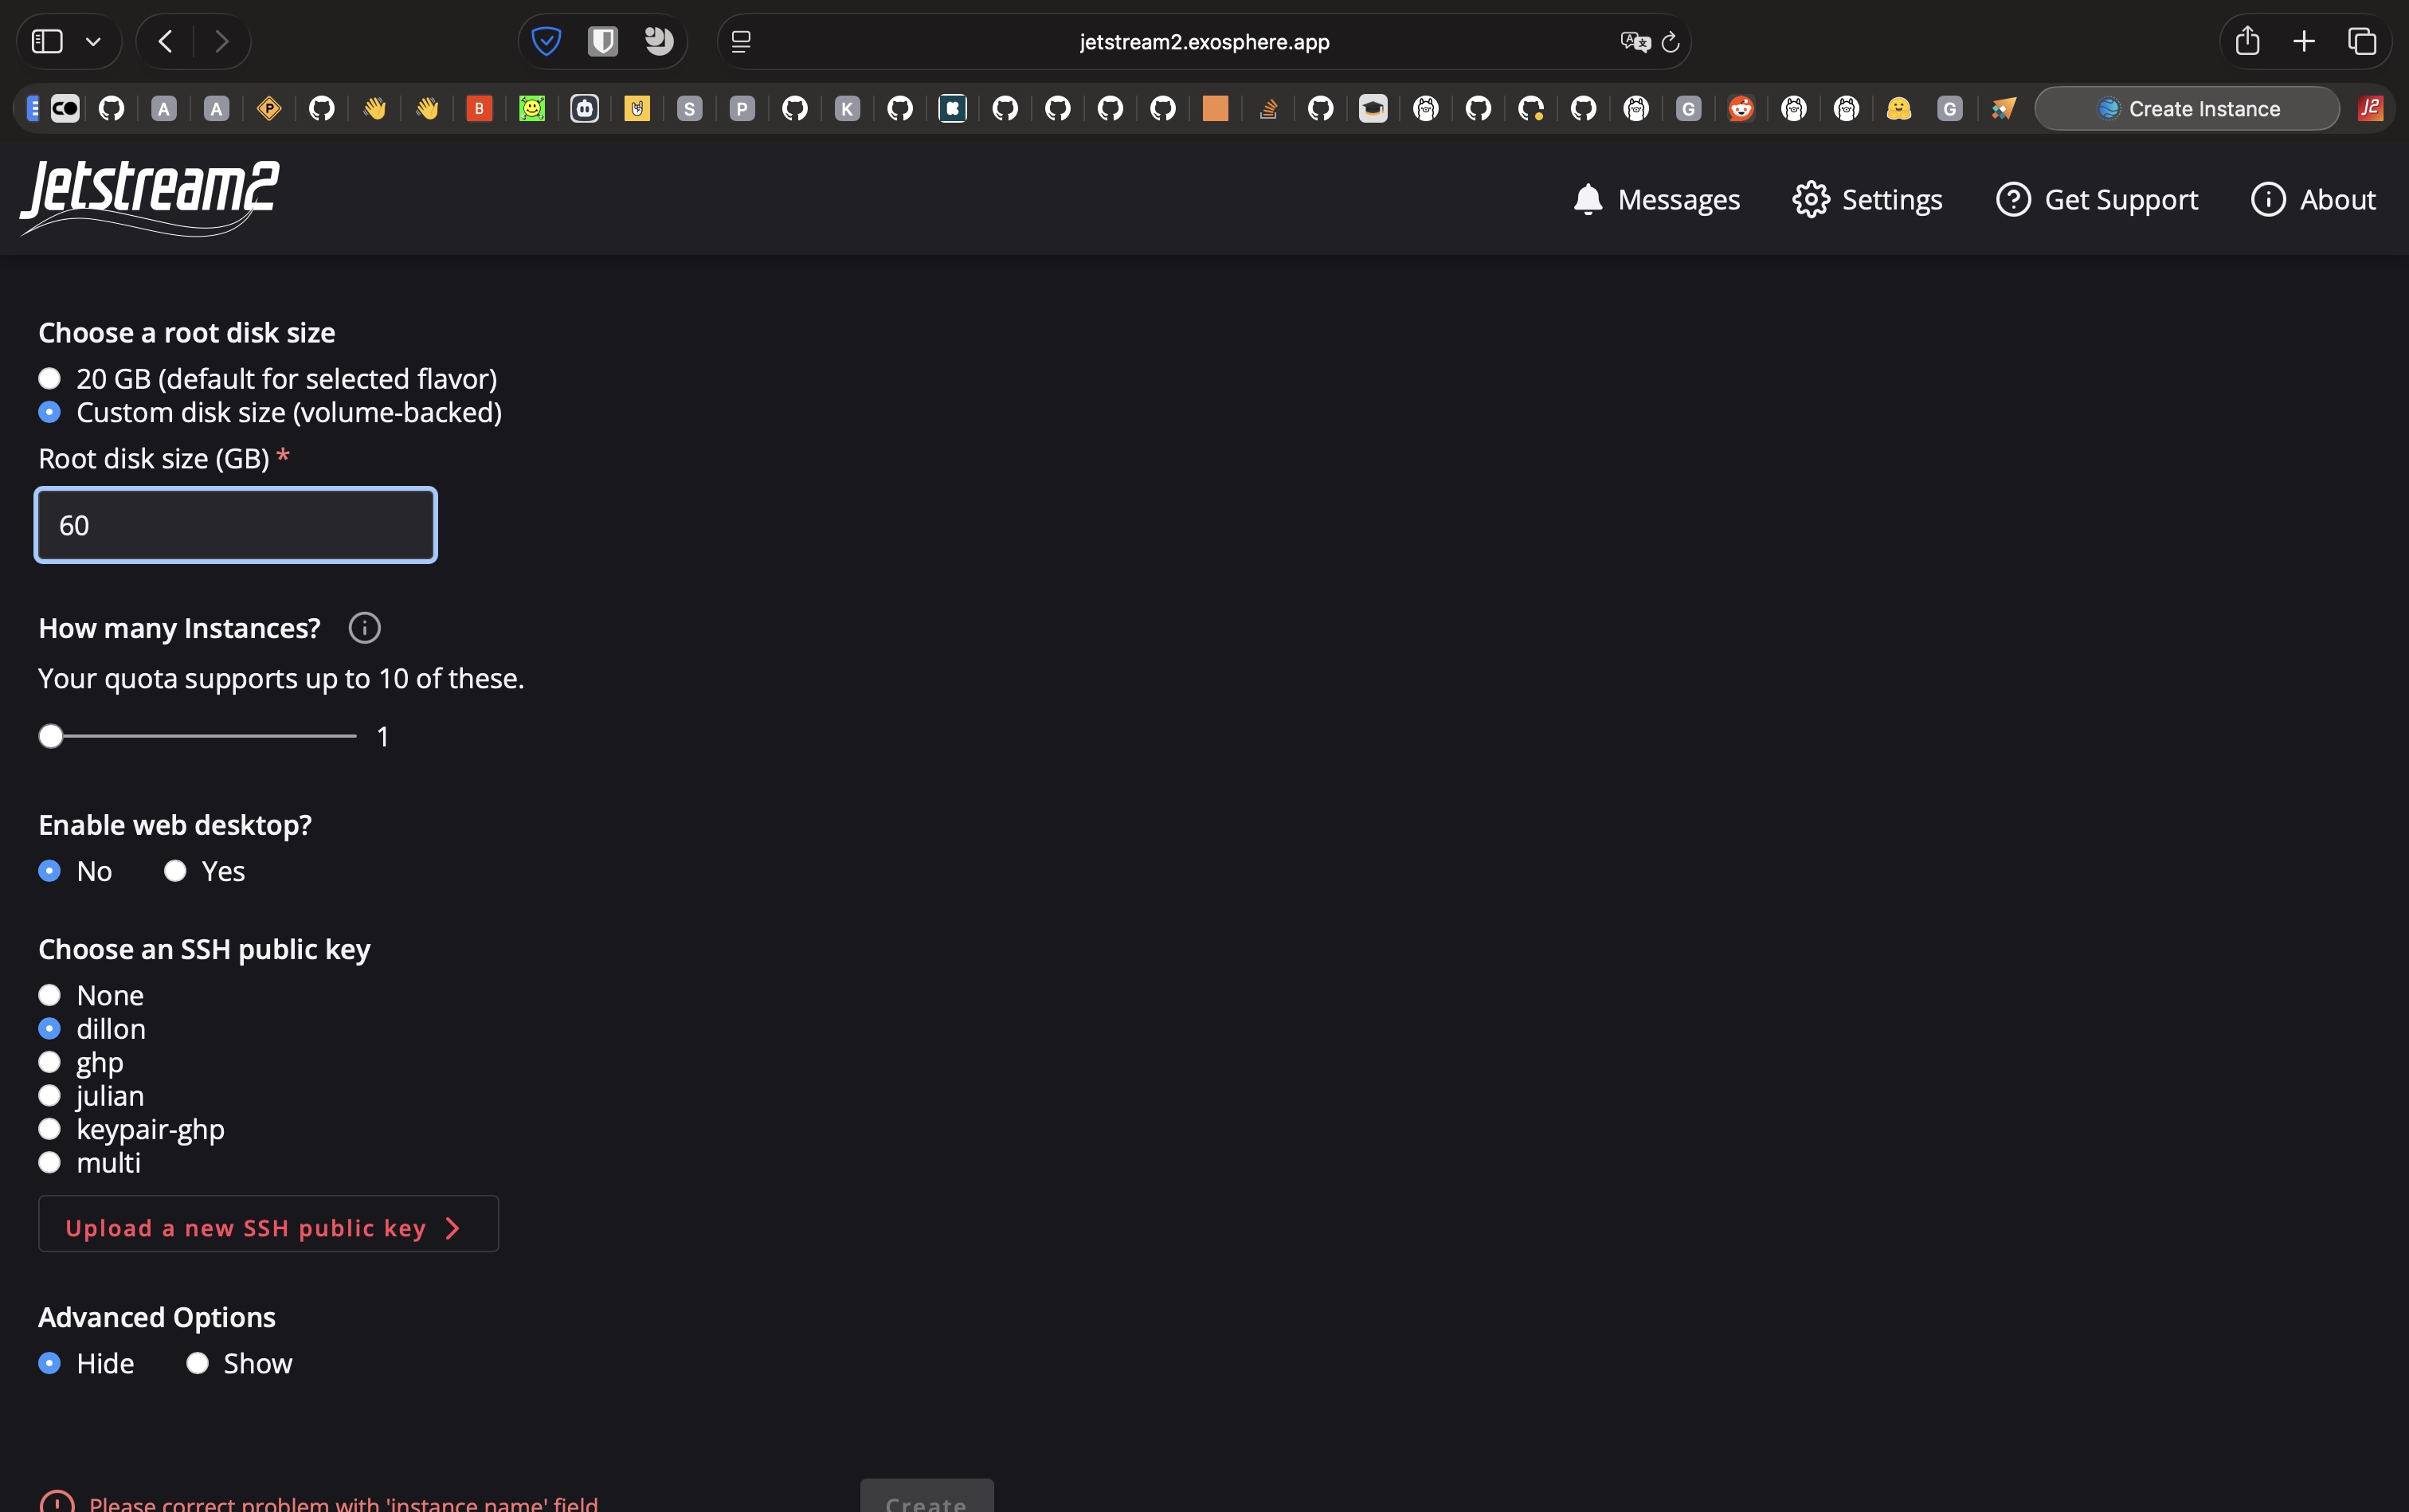
Configure your disk size. Consider datasets and model artifacts (initial model, snapshots during training, etc.). Once ready, click Create:
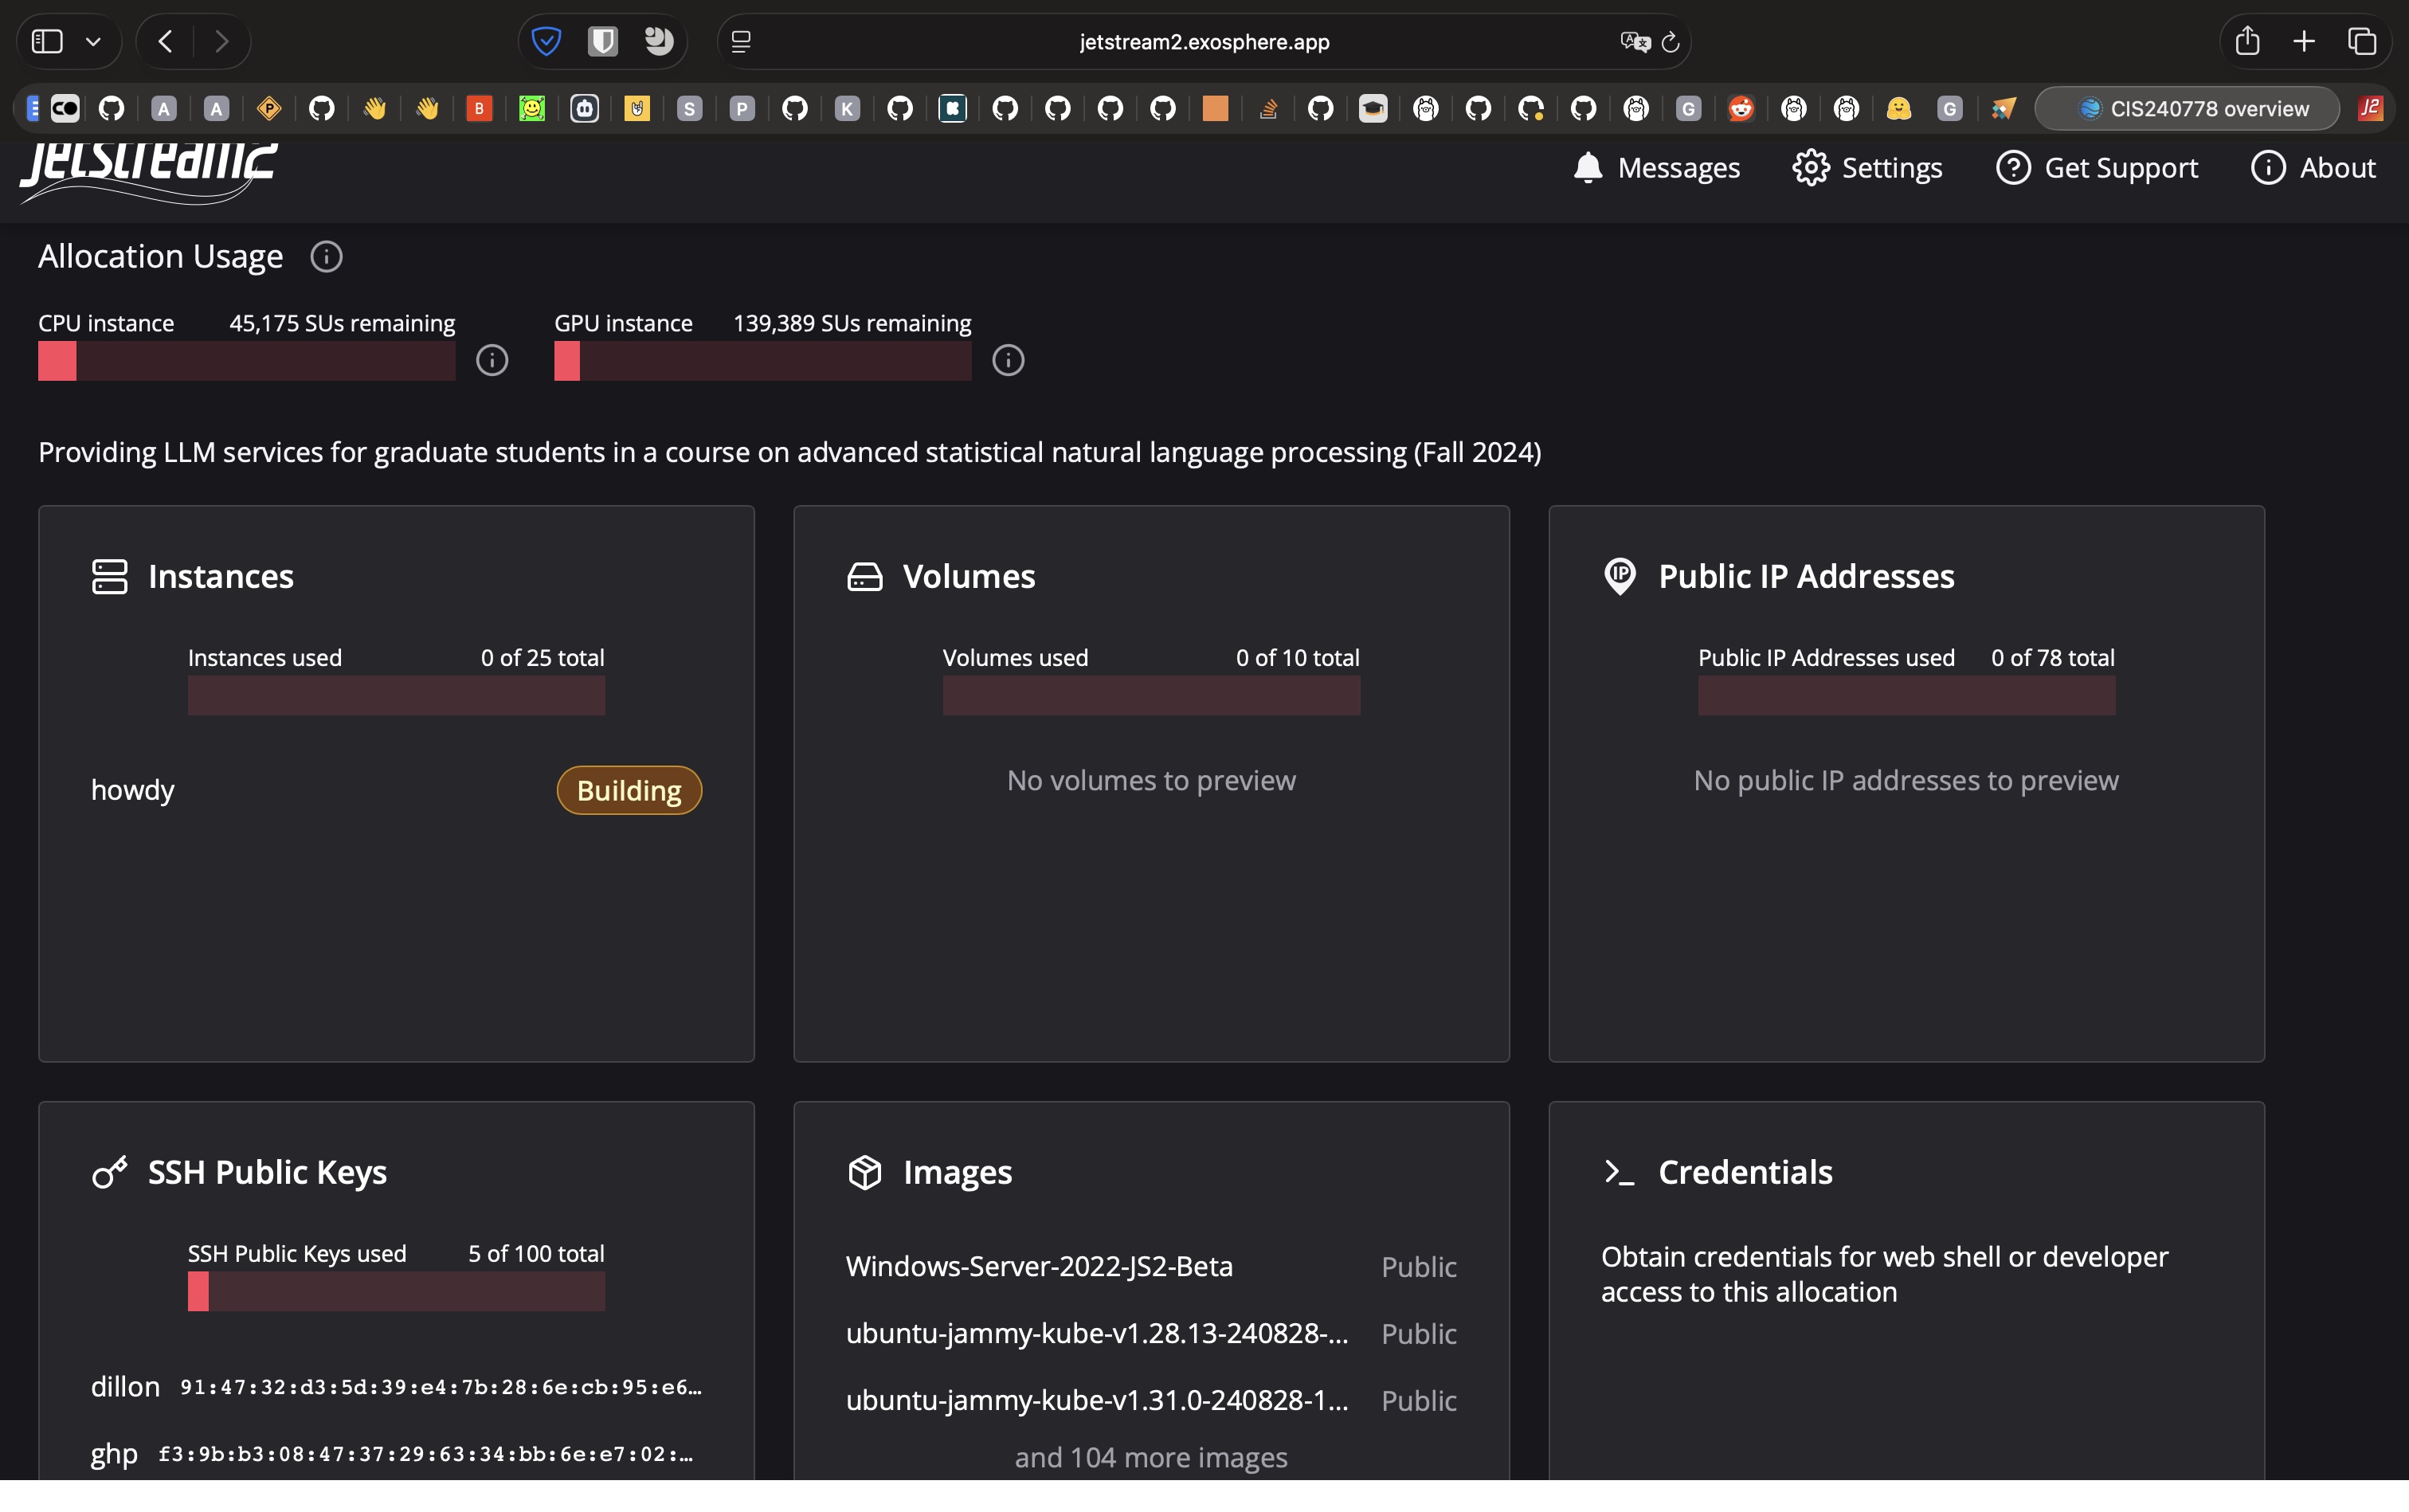
…and wait until your instance is ready ⏳:
Part 3: Using your instance
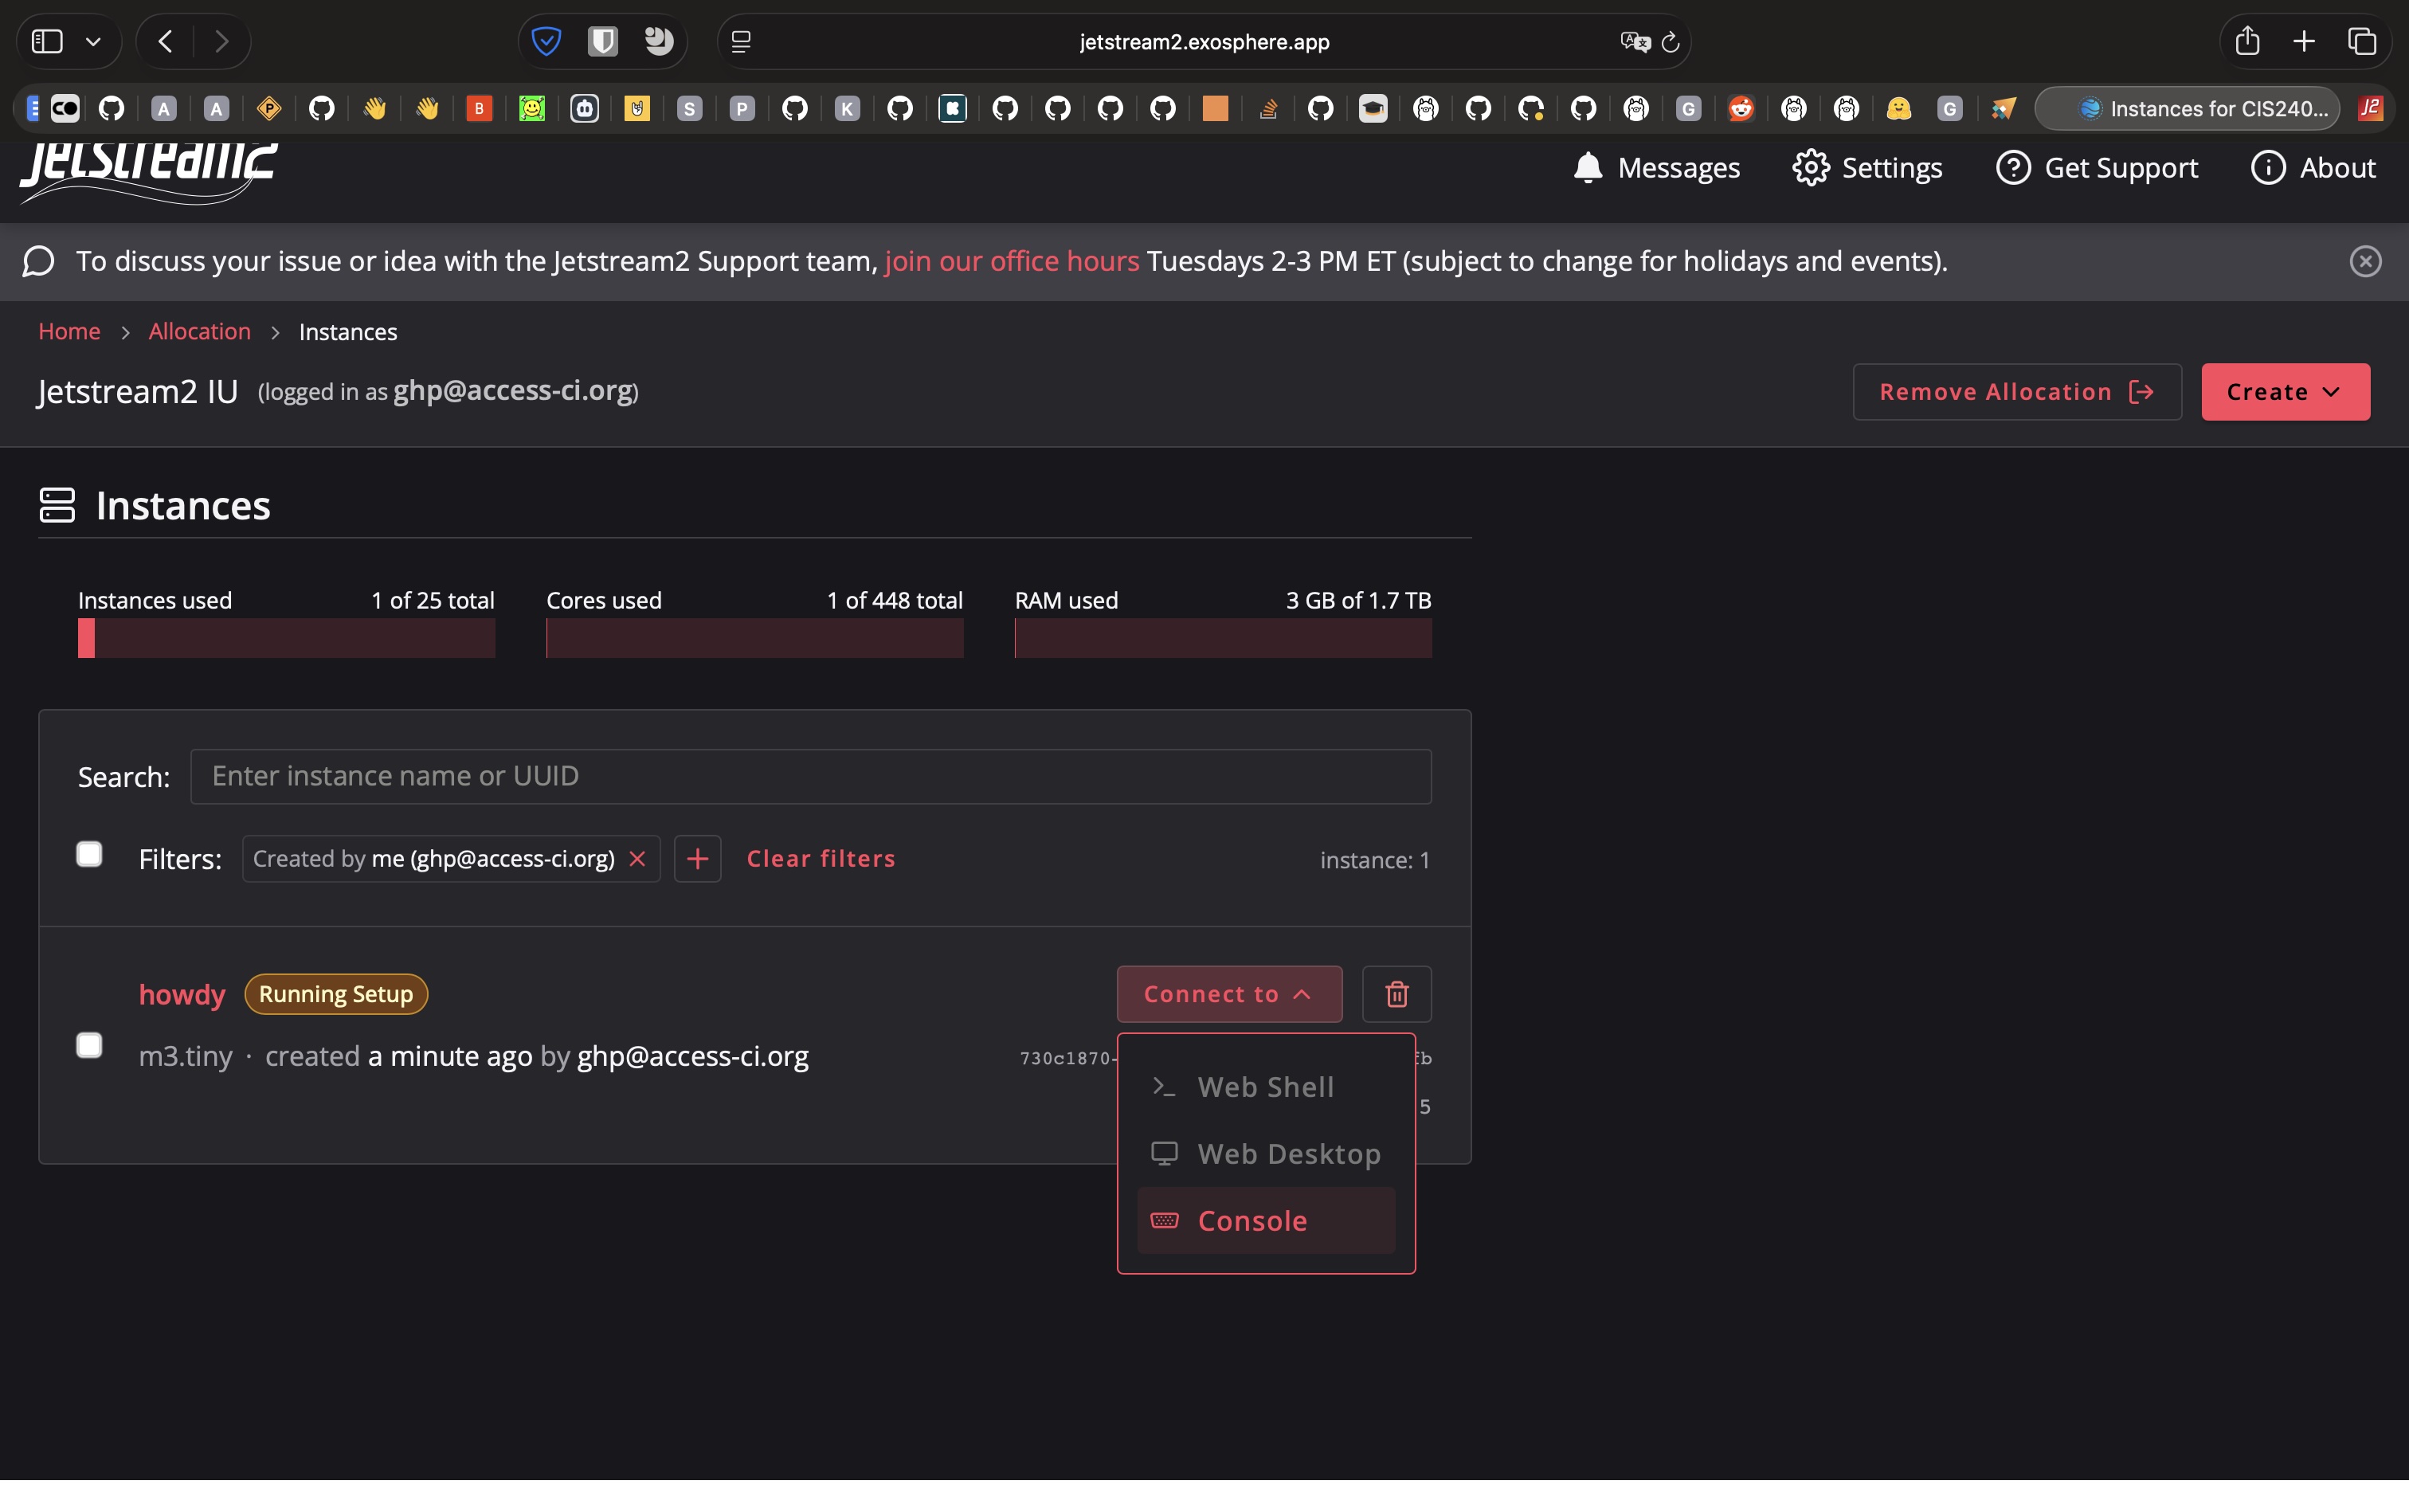
Connect to your instance
Click on the instance.
Once ready, you'll see a view similar to the one below:
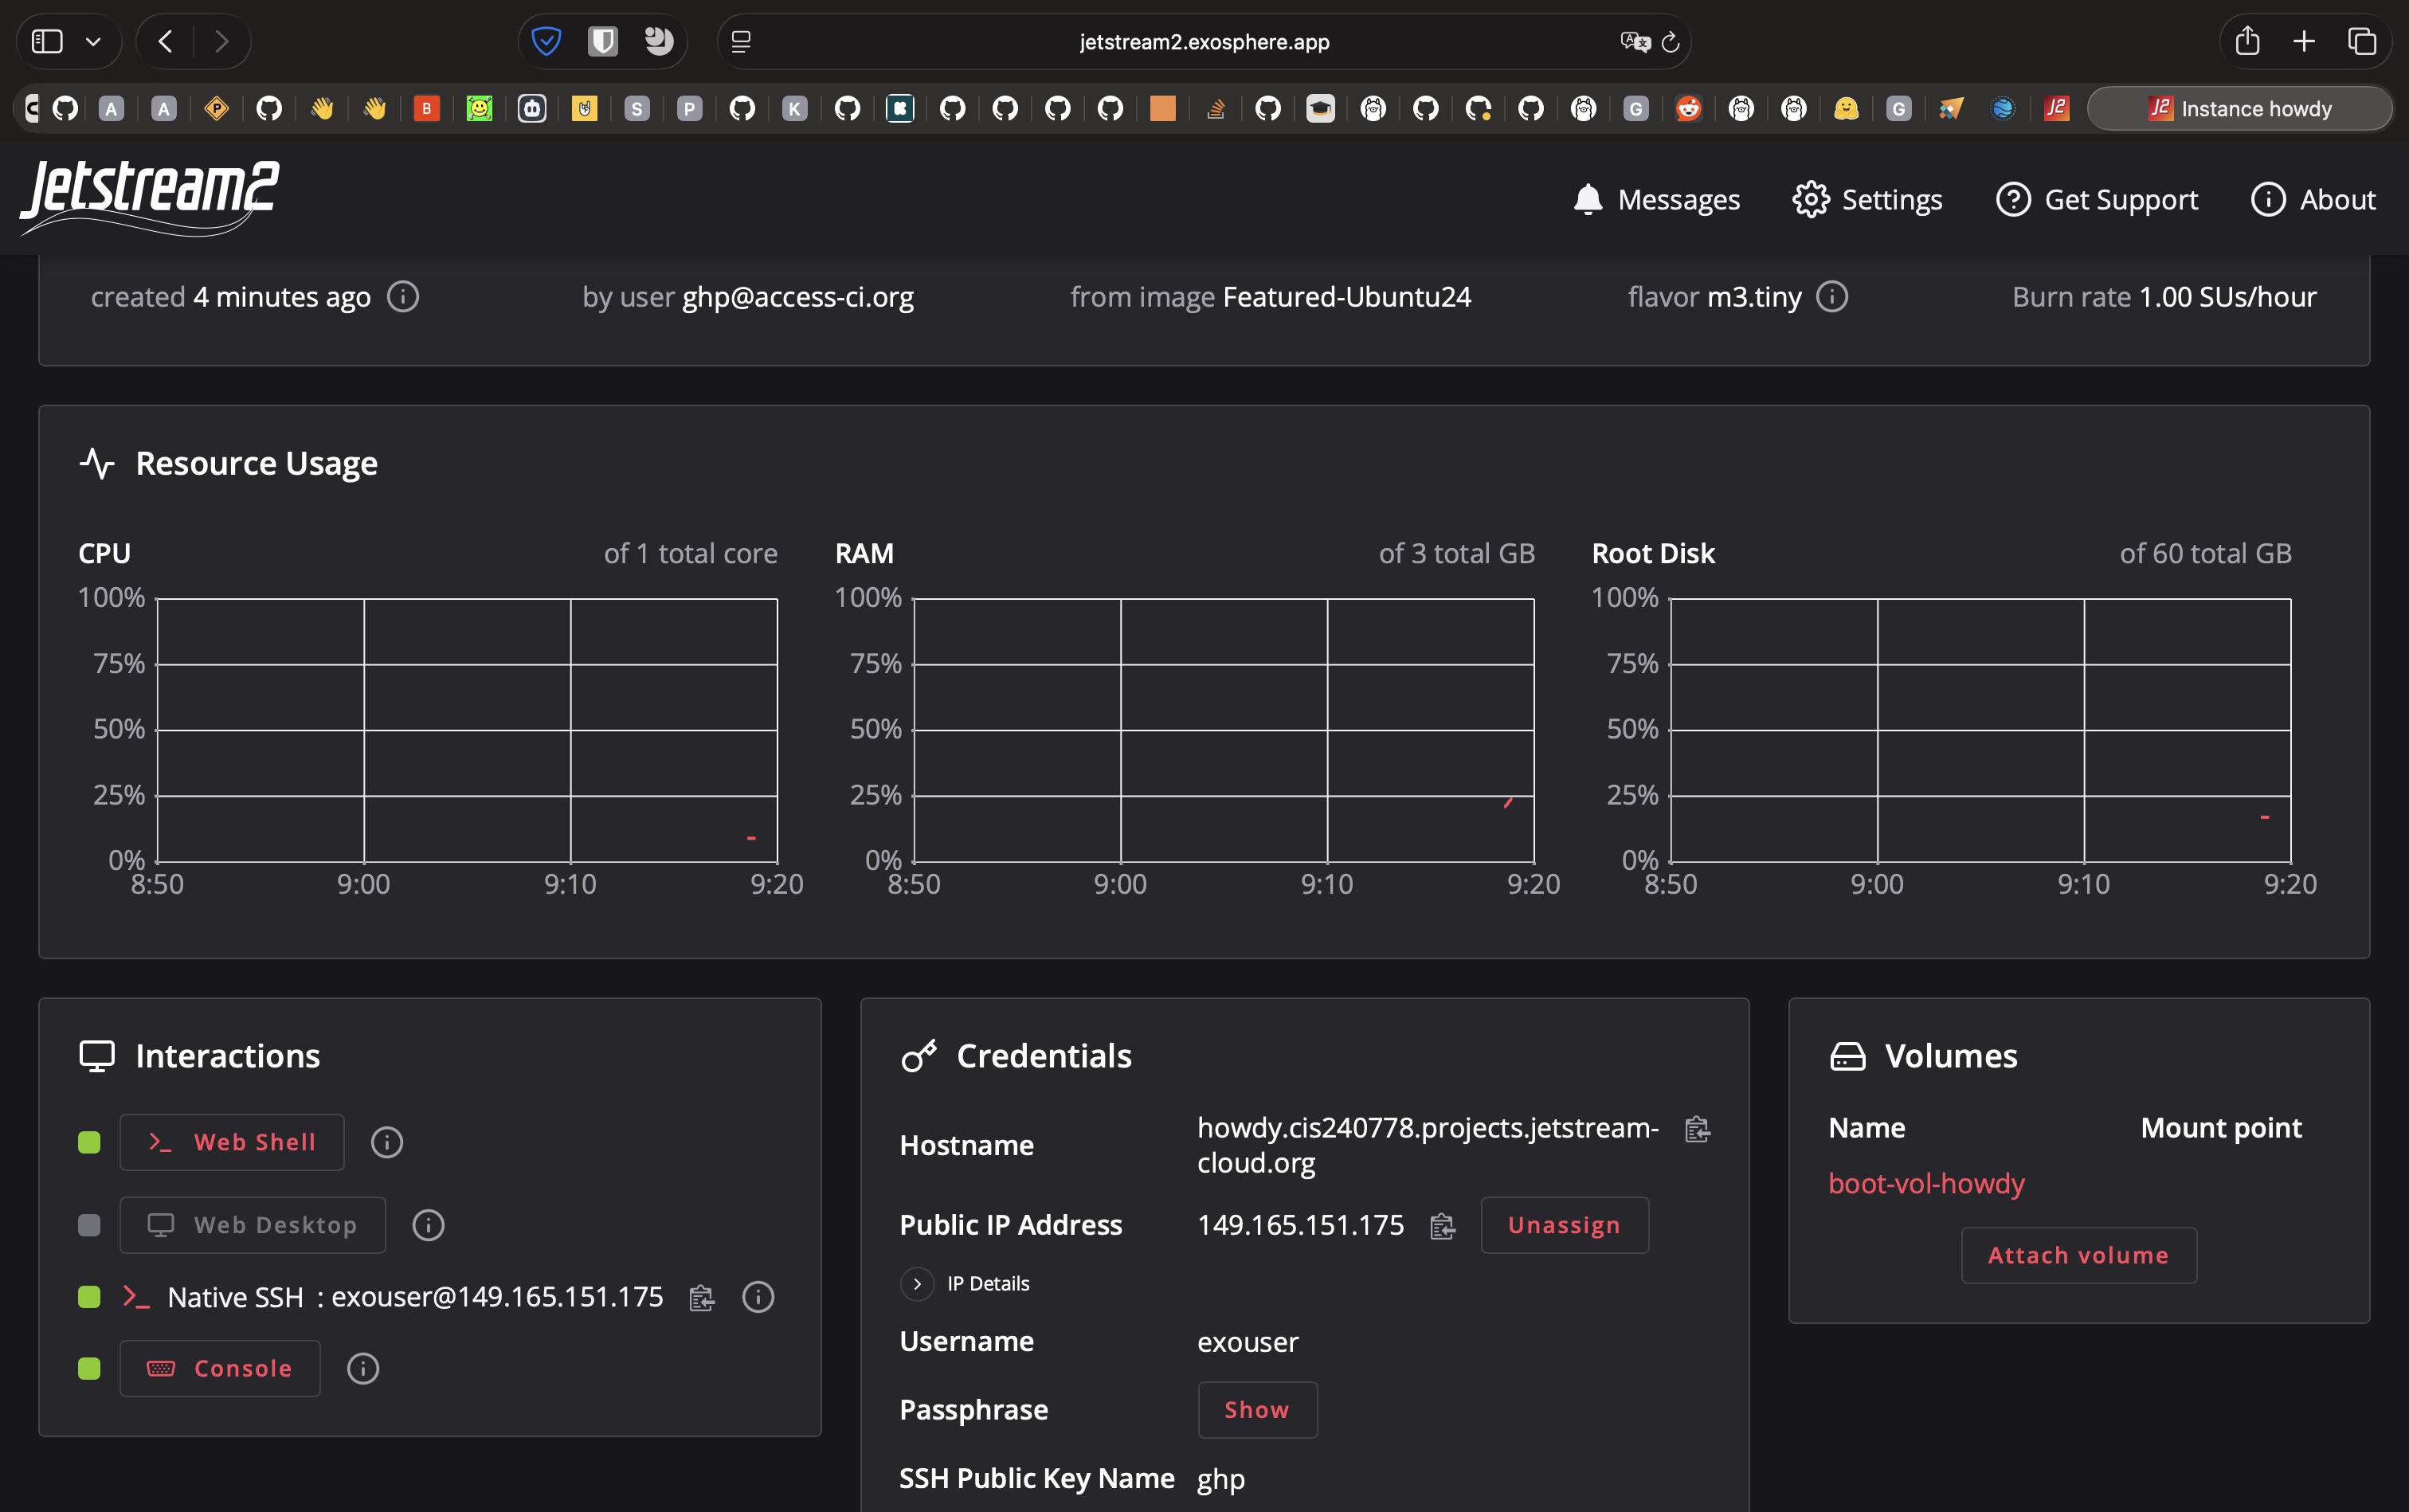
Under Interactions (lower left panel in the image), use the Native SSH command provided in your terminal to connect to your instance:
# replace with your key's path
# and your instance's IP
ssh -i ~/.ssh/your-private-key exouser@xxx.xxx.xxx.xxxPart 4: Managing your instance
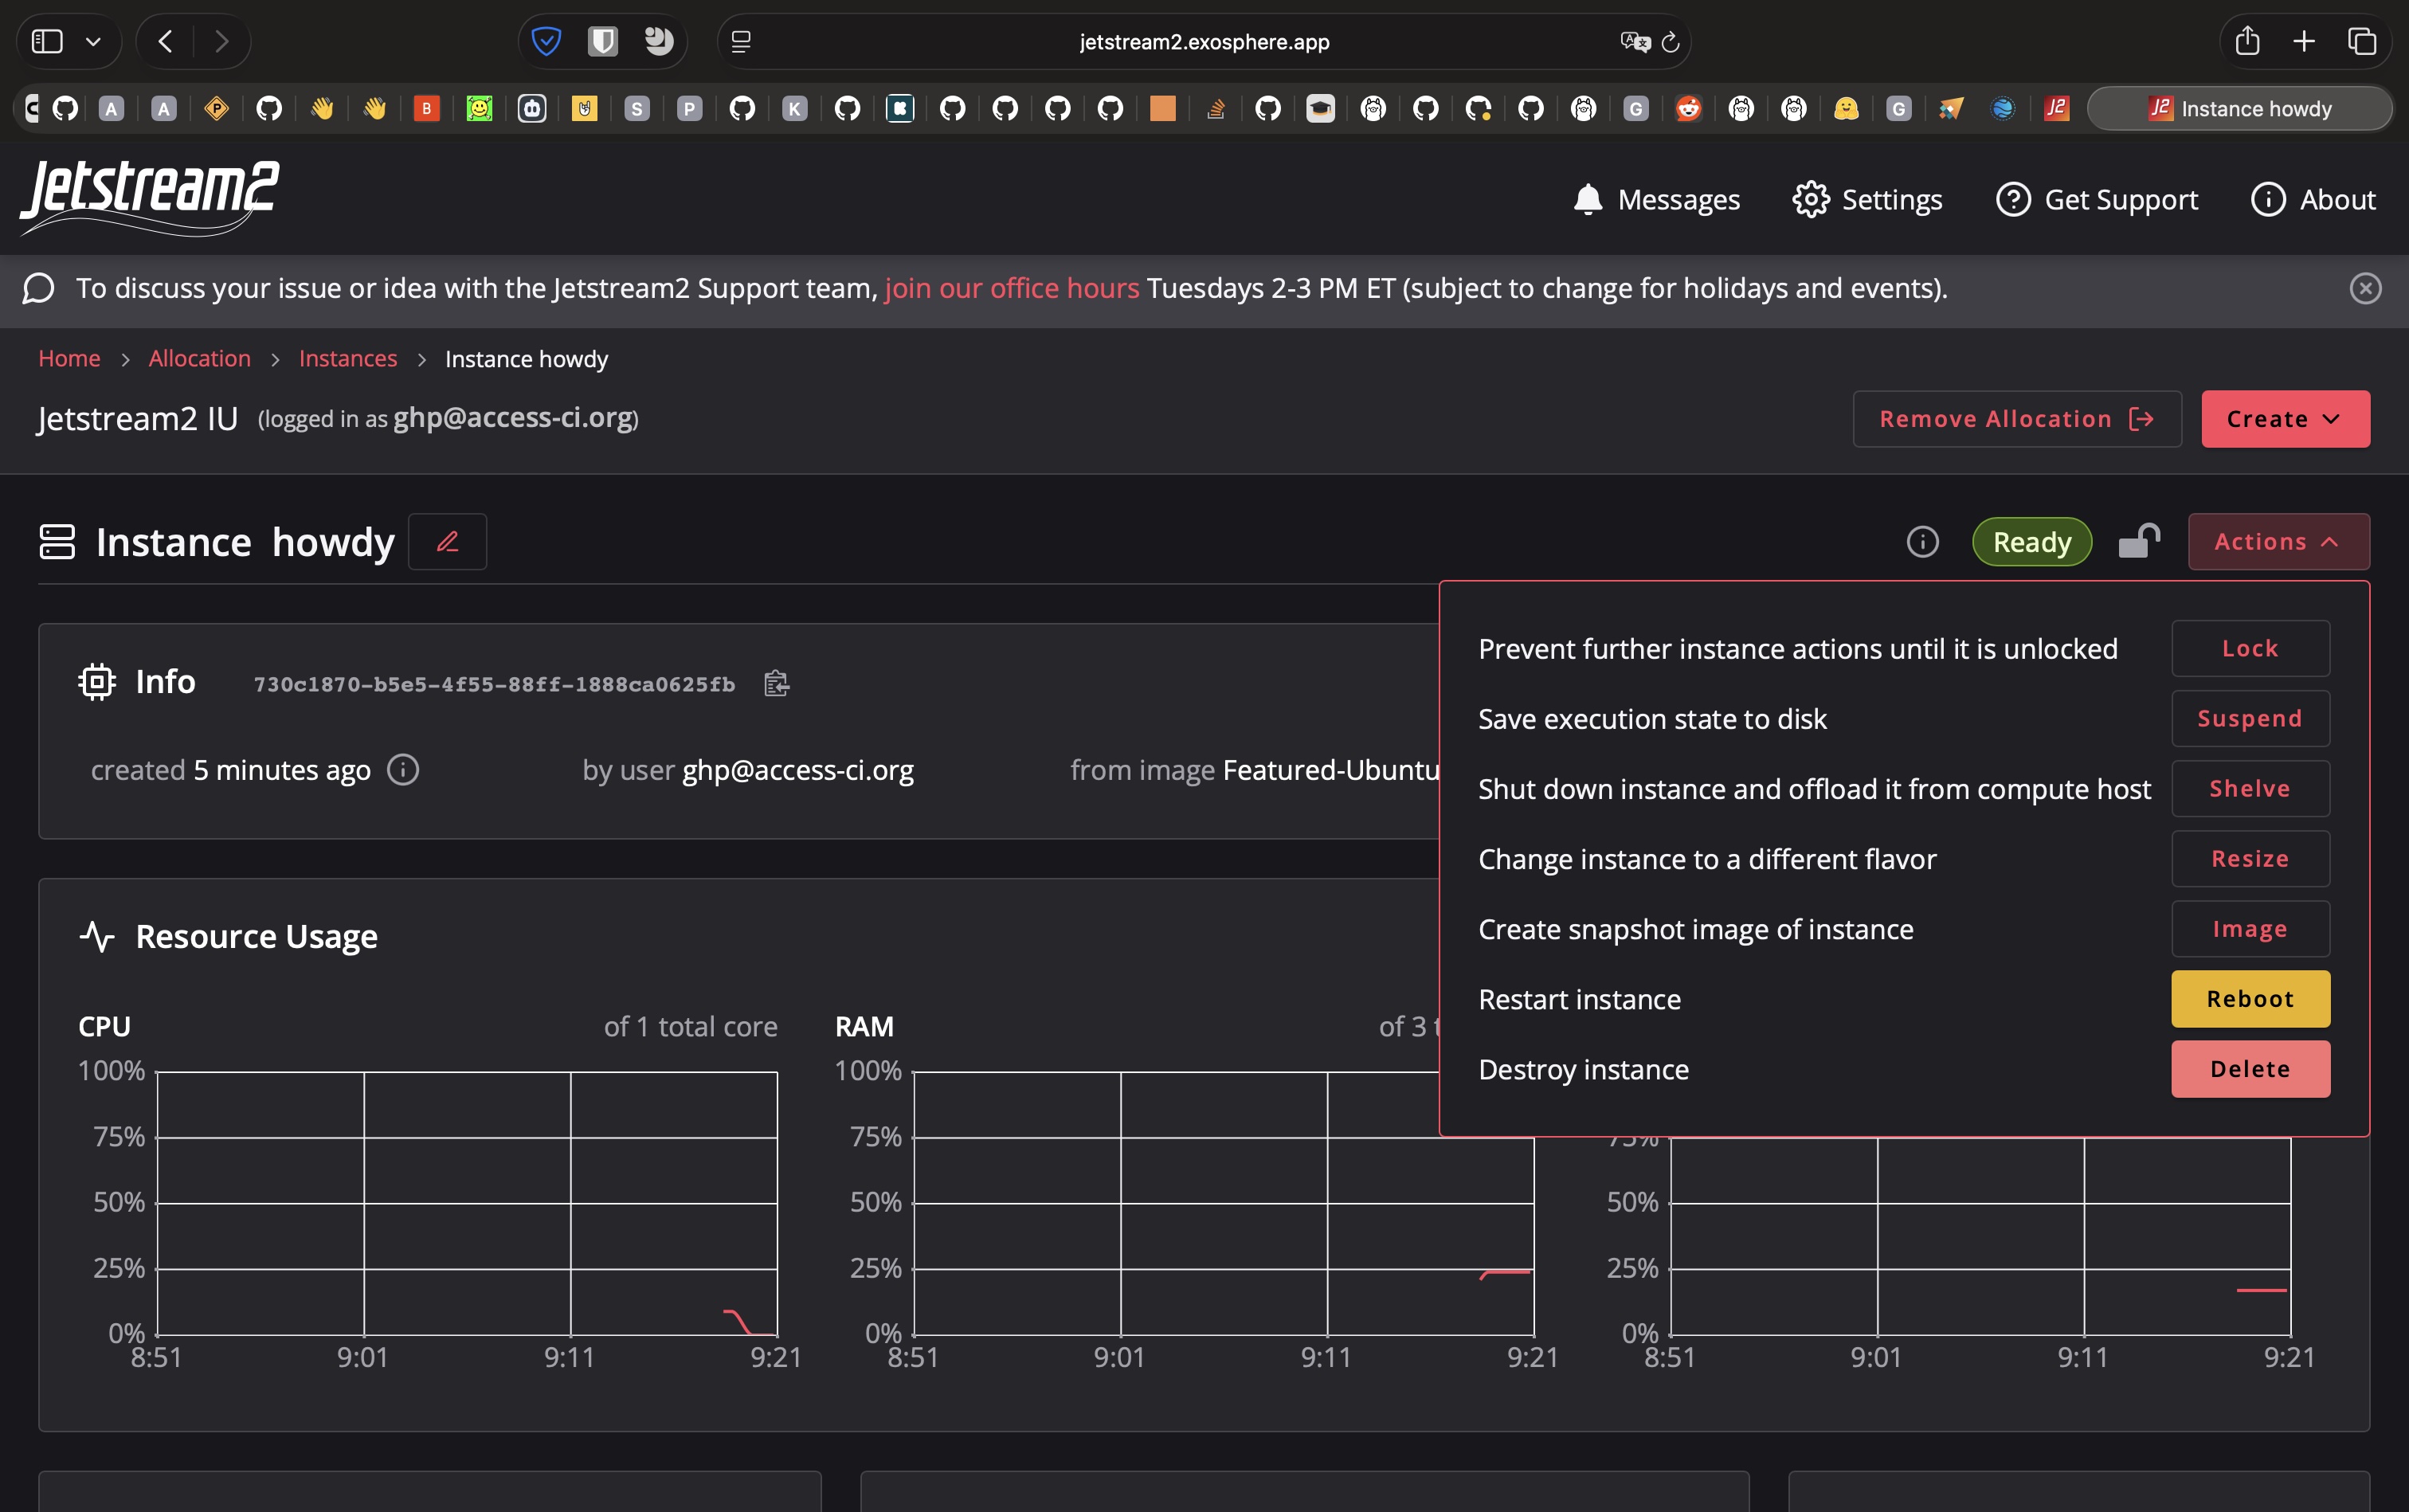
When you're not using your instance, please shelve it to save compute time for others. Once you've finished using it, please terminate (delete your instance).
FAQ
How do I keep stuff running after logging out?
Consider using a terminal multiplexer. I use tmux (pretty heavily). You can learn more about first-time setup of tmux here: https://github.com/tmux/tmux/wiki
That's a lot of manual steps! Is this how everyone does it?
Jetstream 2 is built on top of an open source cloud computing platform called OpenStack. There are a number of tools for interacting programmatically with OpenStack.
If you're wanting to design a custom "instance source" (ex. a particular version of some OS with particular CUDA drivers pre-installed), you may find tools like Packer useful. There are tools like Terraform/OpenTofu that will allow you to configure and manage compute infrastructure as code. These tools can have a steep learning curve1, but they make deployments more reproducible and portable to other clouds.
Footnotes
- Part of the steepness of the learning curve is due to also needing to learn fundamental concepts of networking, storage, and access permissions for cloud computing. ↩